

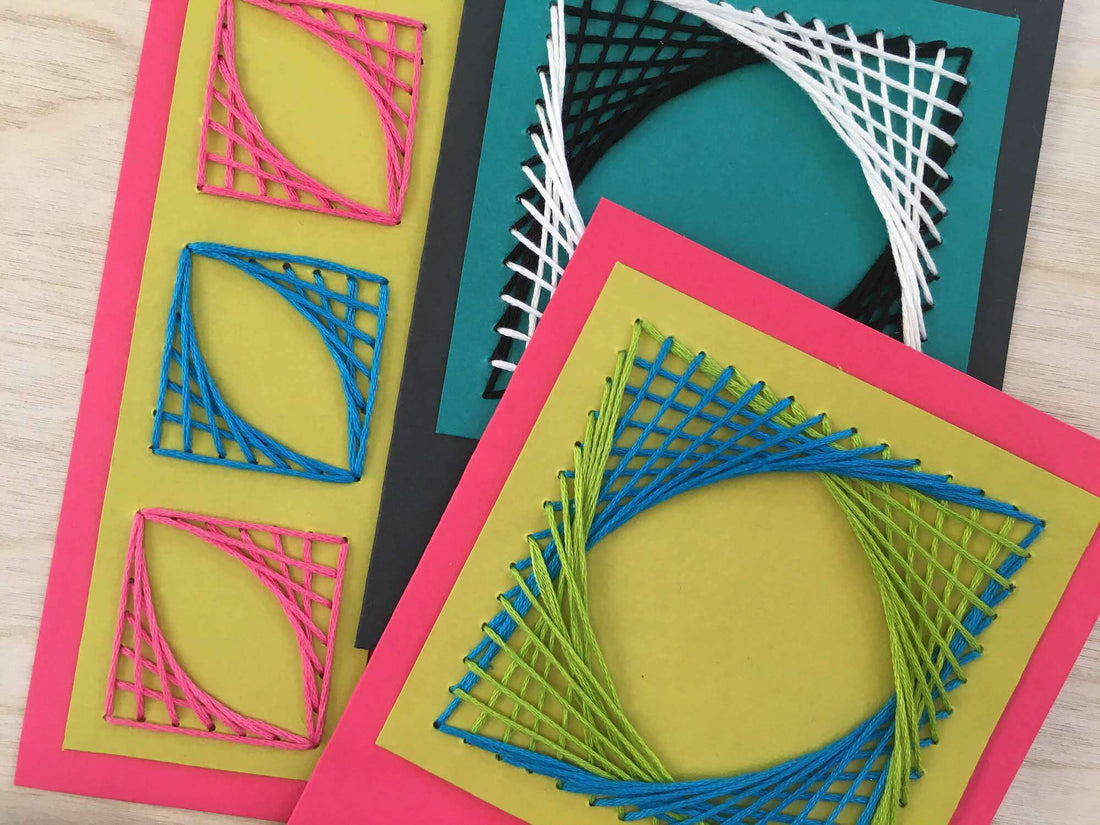
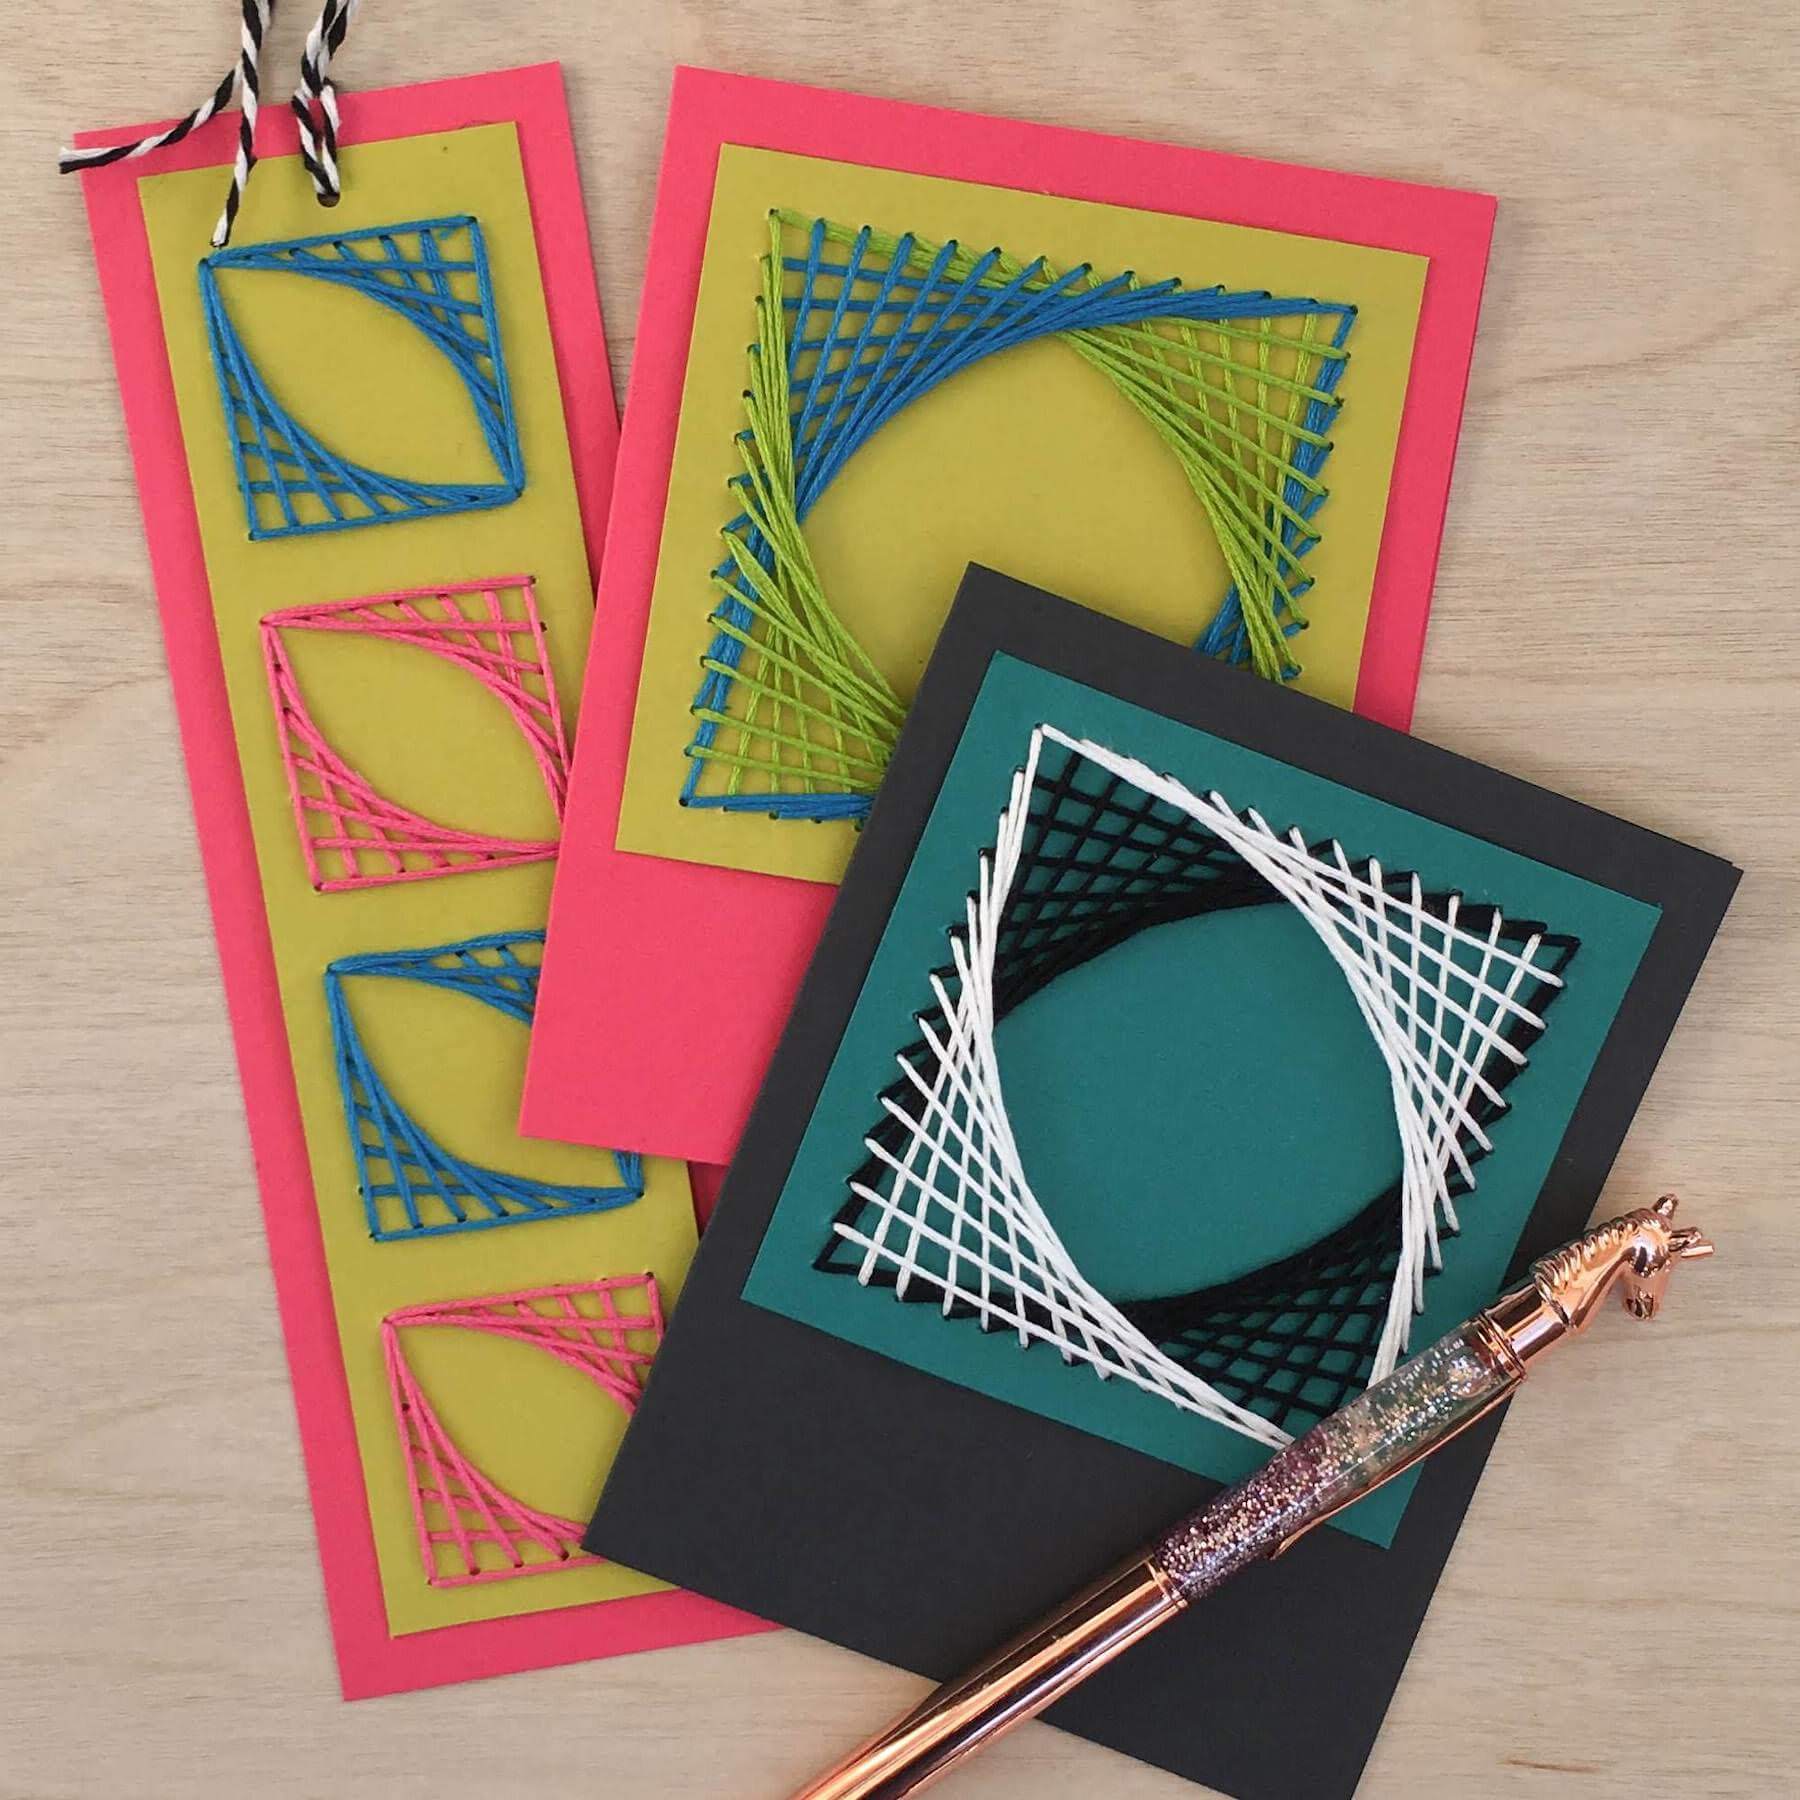
Creating geometry-based patterns from string is immensely satisfying, as is the punching of cardstock with a needle! This technique is called Curve Stitching; the creation of curves by use of straight lines. The Tropical Nights multipack provides lusciously saturated colors against which to contrast the texture created by string. The result is a giftable piece of string art!
Materials:
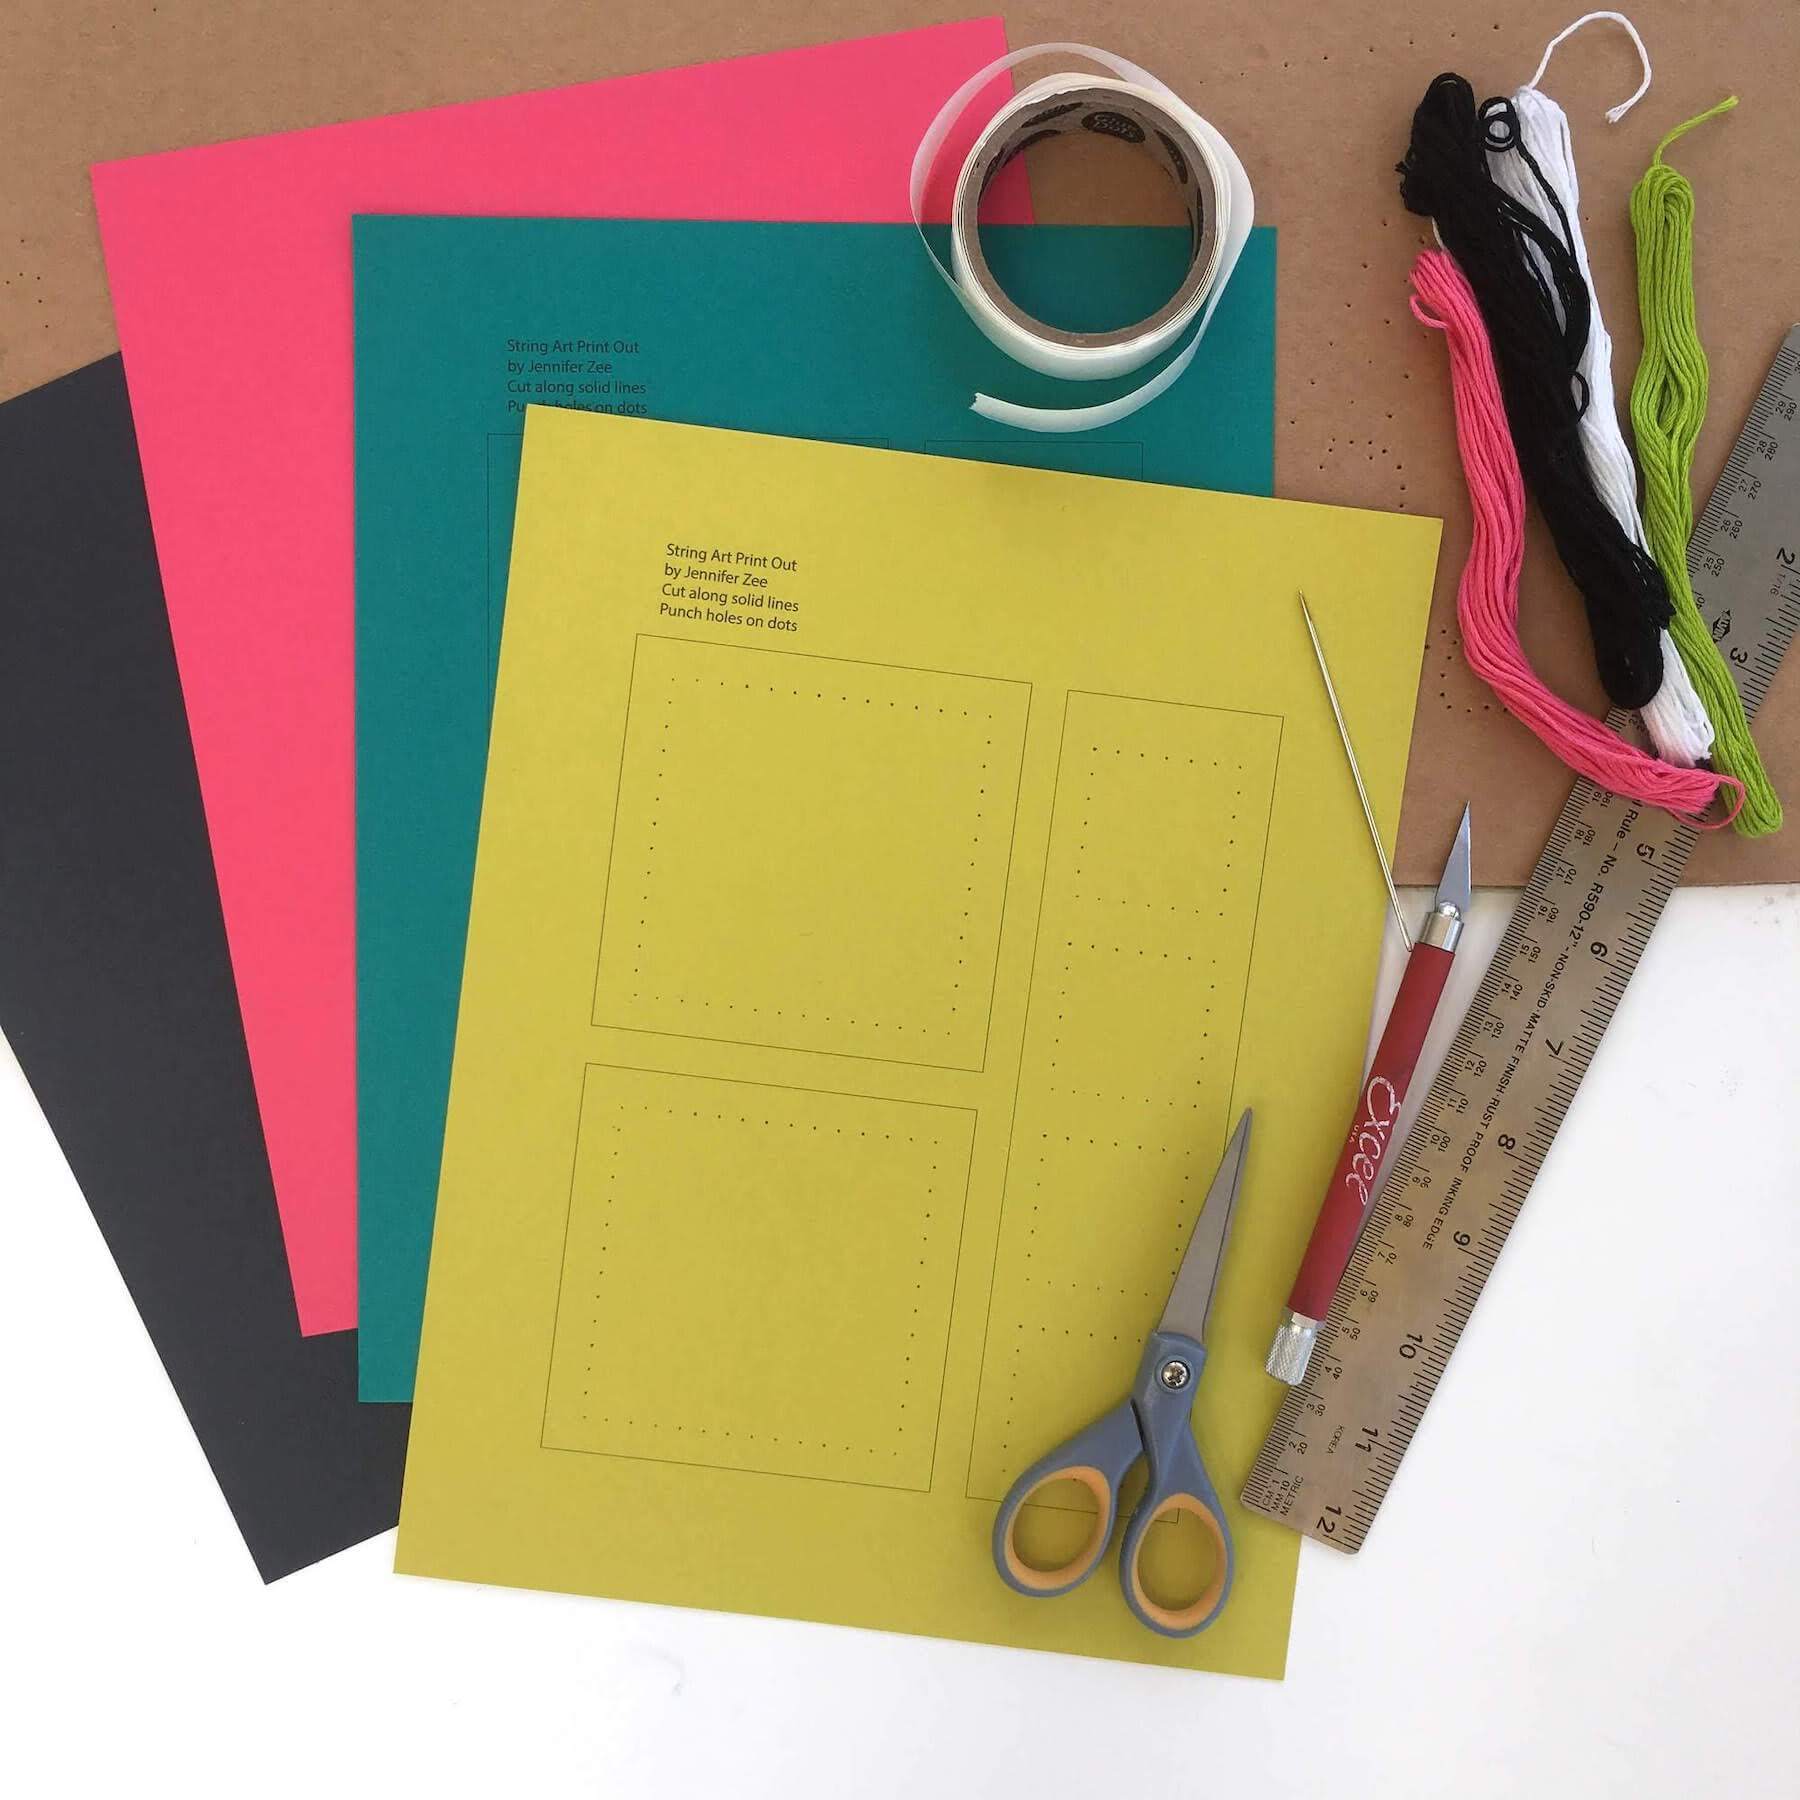
- Cardstock Warehouse Cardstock Papers
- 2 sheets of 8.5x11 : I selected from the Tropical Nights mult-pack -
- this will make two A2 cards, or one A2 card and one bookmark
- String Printout FREE PDF (click on link, then right-click to save)
- Printed on paper color of your choice
Tools:
- Papercutting blade (such as Excel or Exacto)
- Self-healing mat
- Scissors
- Large embroidery needle
- Adhesive glue dots
- 2 skeins of embroidery floss (100 inches of each color)
- Old cardboard surface (side of a box)
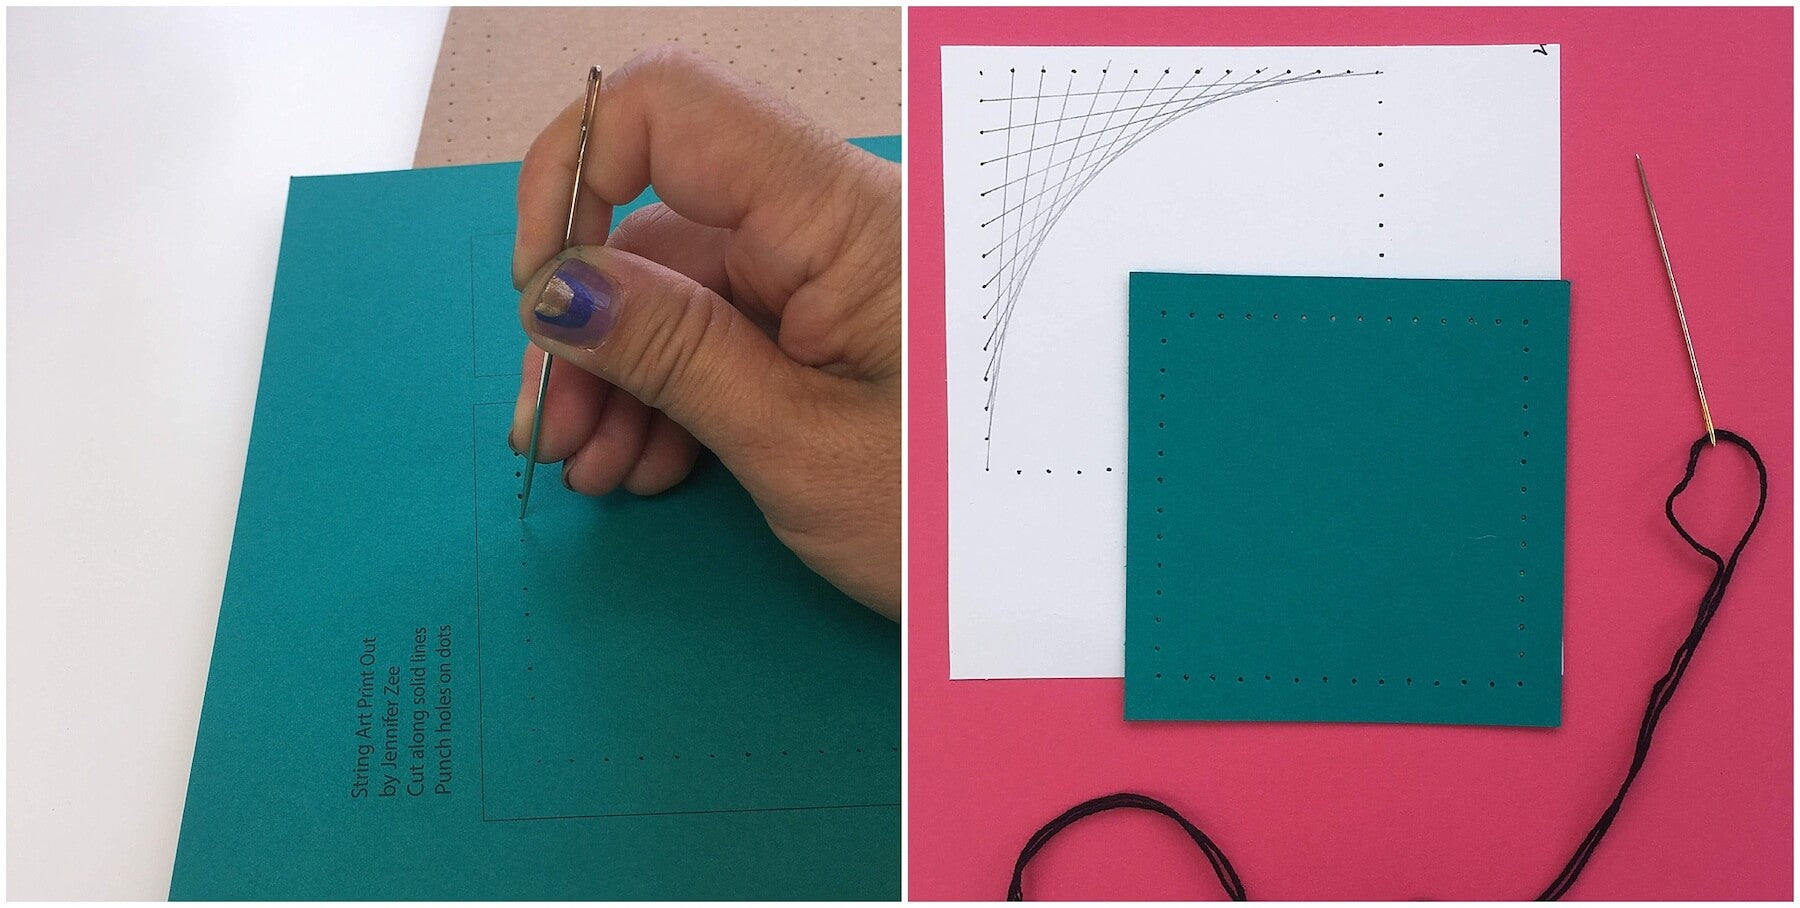
Print out the PDF on the cardstock you choose as your string art surface. The other cardstock will be used as the card or bookmark onto which you’ll adhere your art.
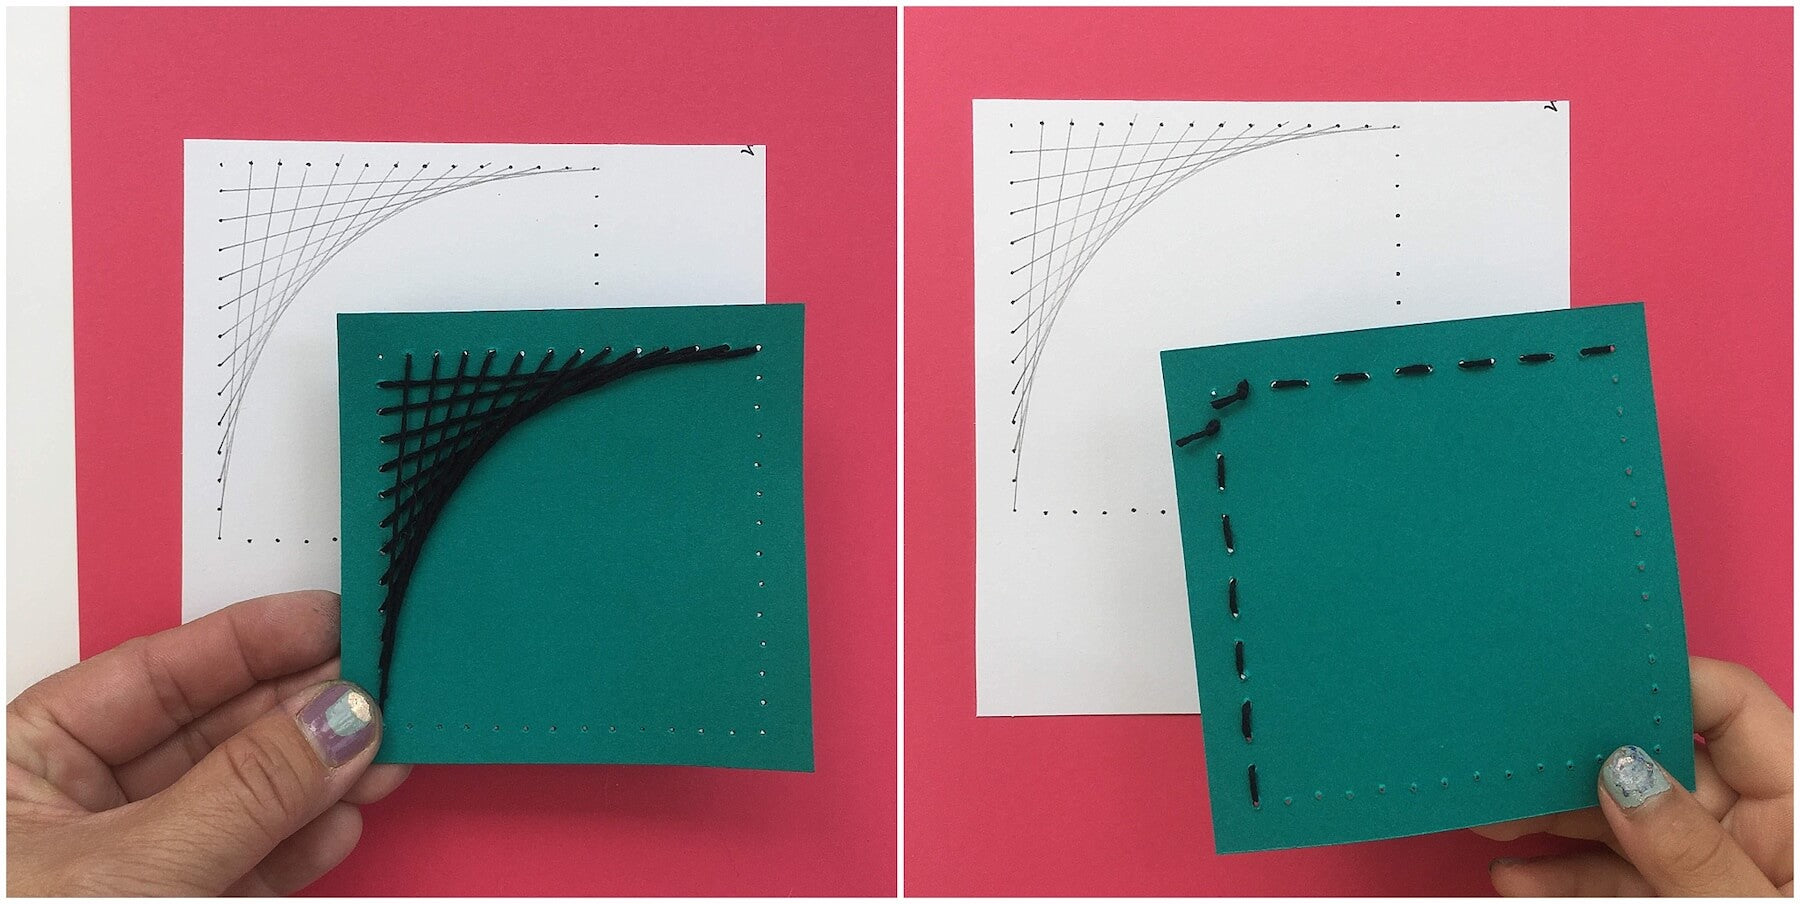
Place printed cardstock over cardboard and use the embroidery needle to punch holes at each dot. Cut out shapes along solid lines. Thread your needle with 50 inches of floss, and tie a double knot at one end. The pencil drawing shows the pattern of stitches we’ll be making.
Start by threading your needle up through the hole that is one away from a corner A.
Put needle back in at corner B.
Pull needle up one space left of corner B and back in at 2 holes from corner A.
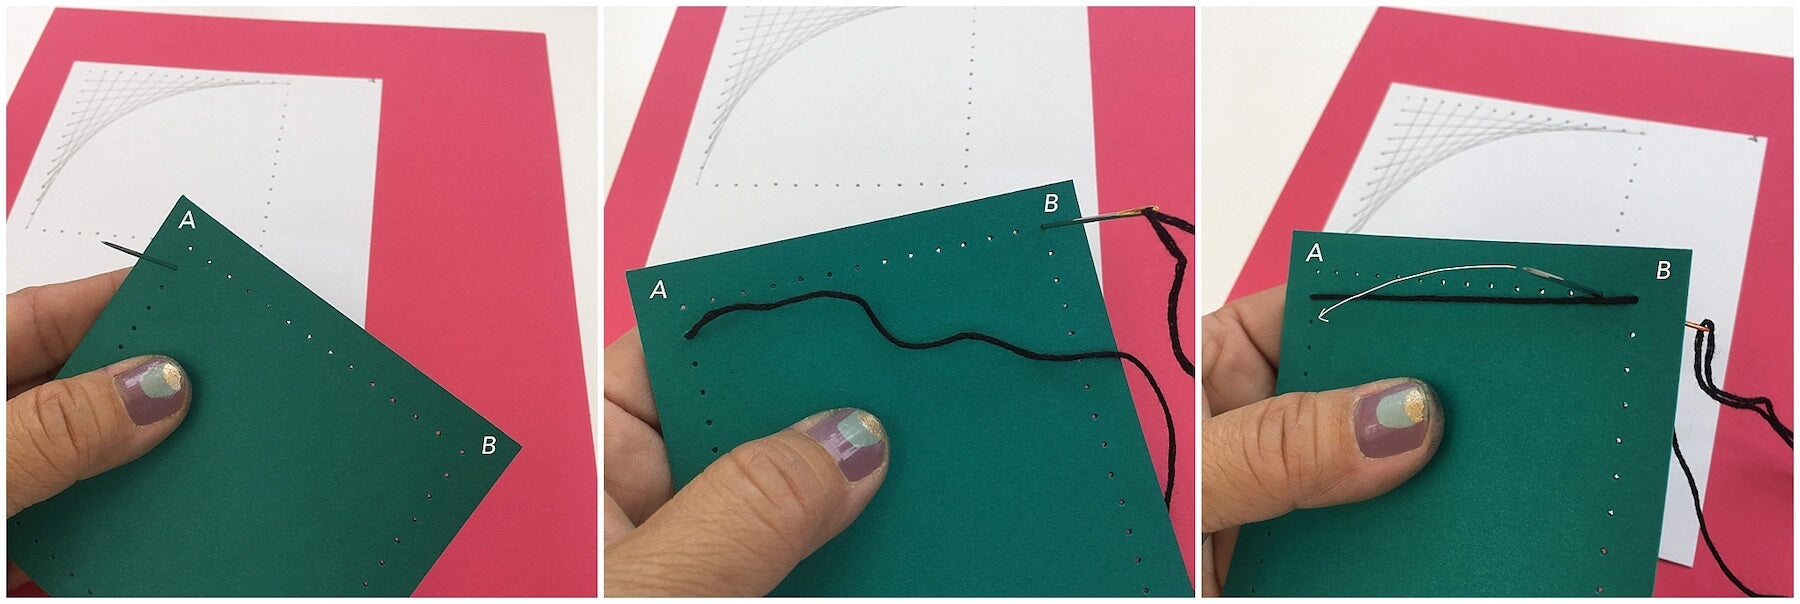
When you’ve completed a corner, tie a knot to hold your string in place. It will look like this on the top side and bottom side.
Rethread the needle with another 50 inches of the same floss and start the opposite corner. Once complete, you’ll have created an eye shape.
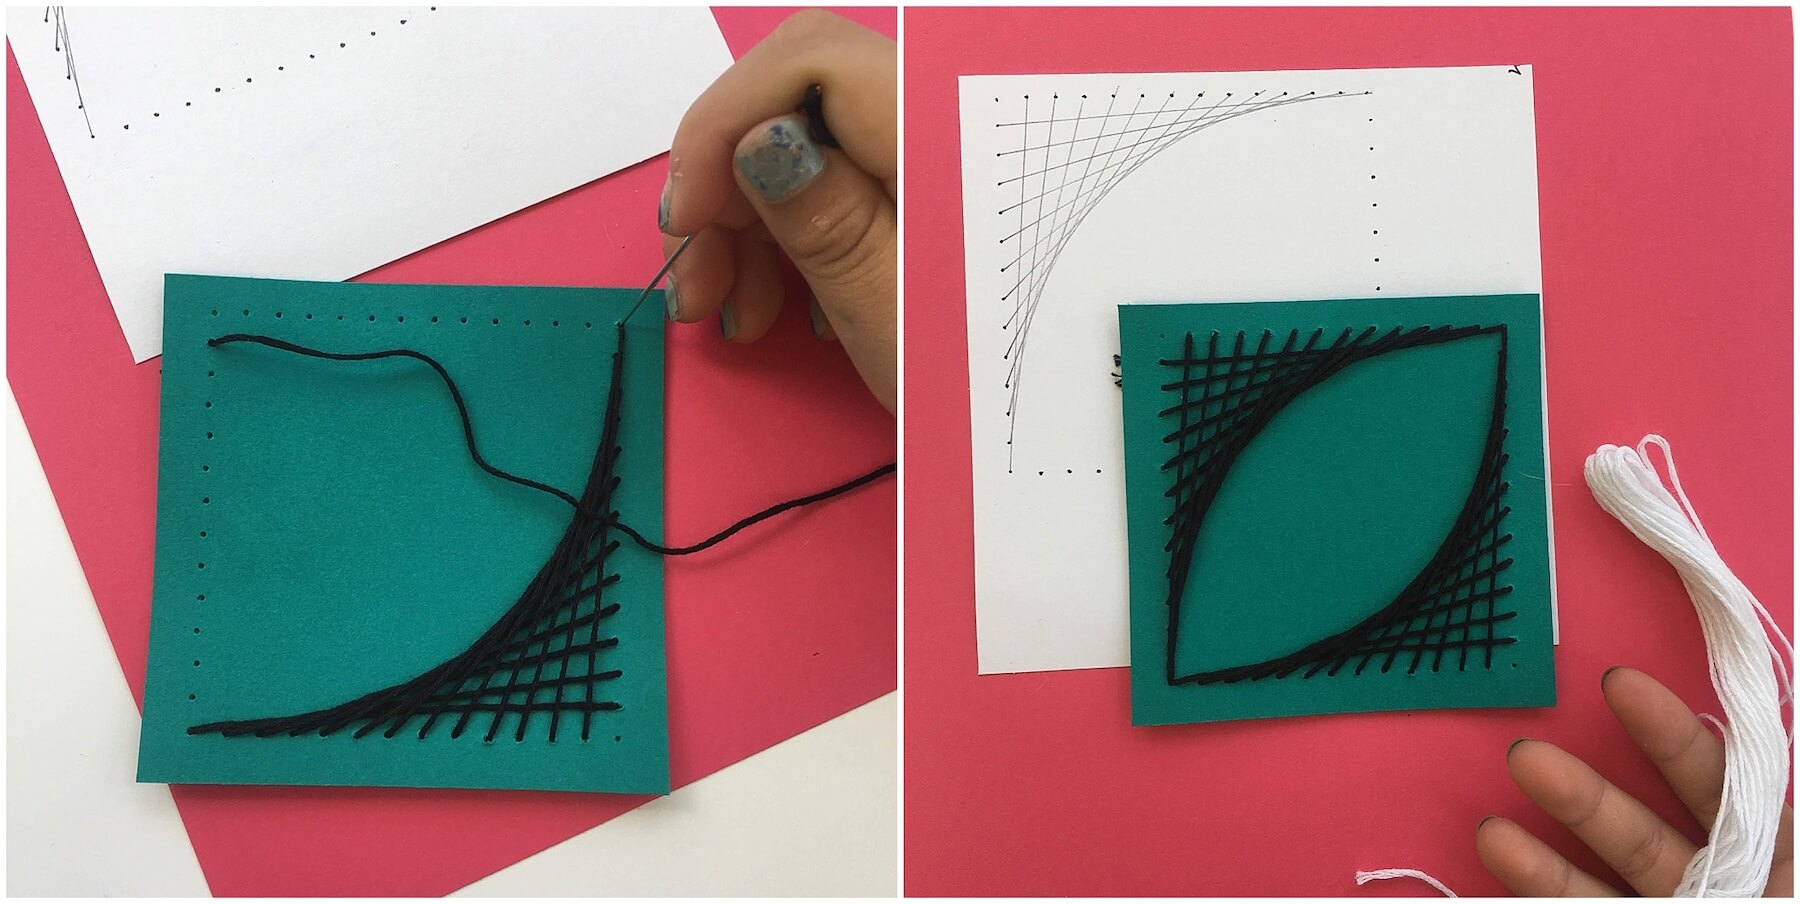
Switch floss colors and rethread your needle. Repeat the pattern over the remaining two corners, re-using the same holes and working over the first design.
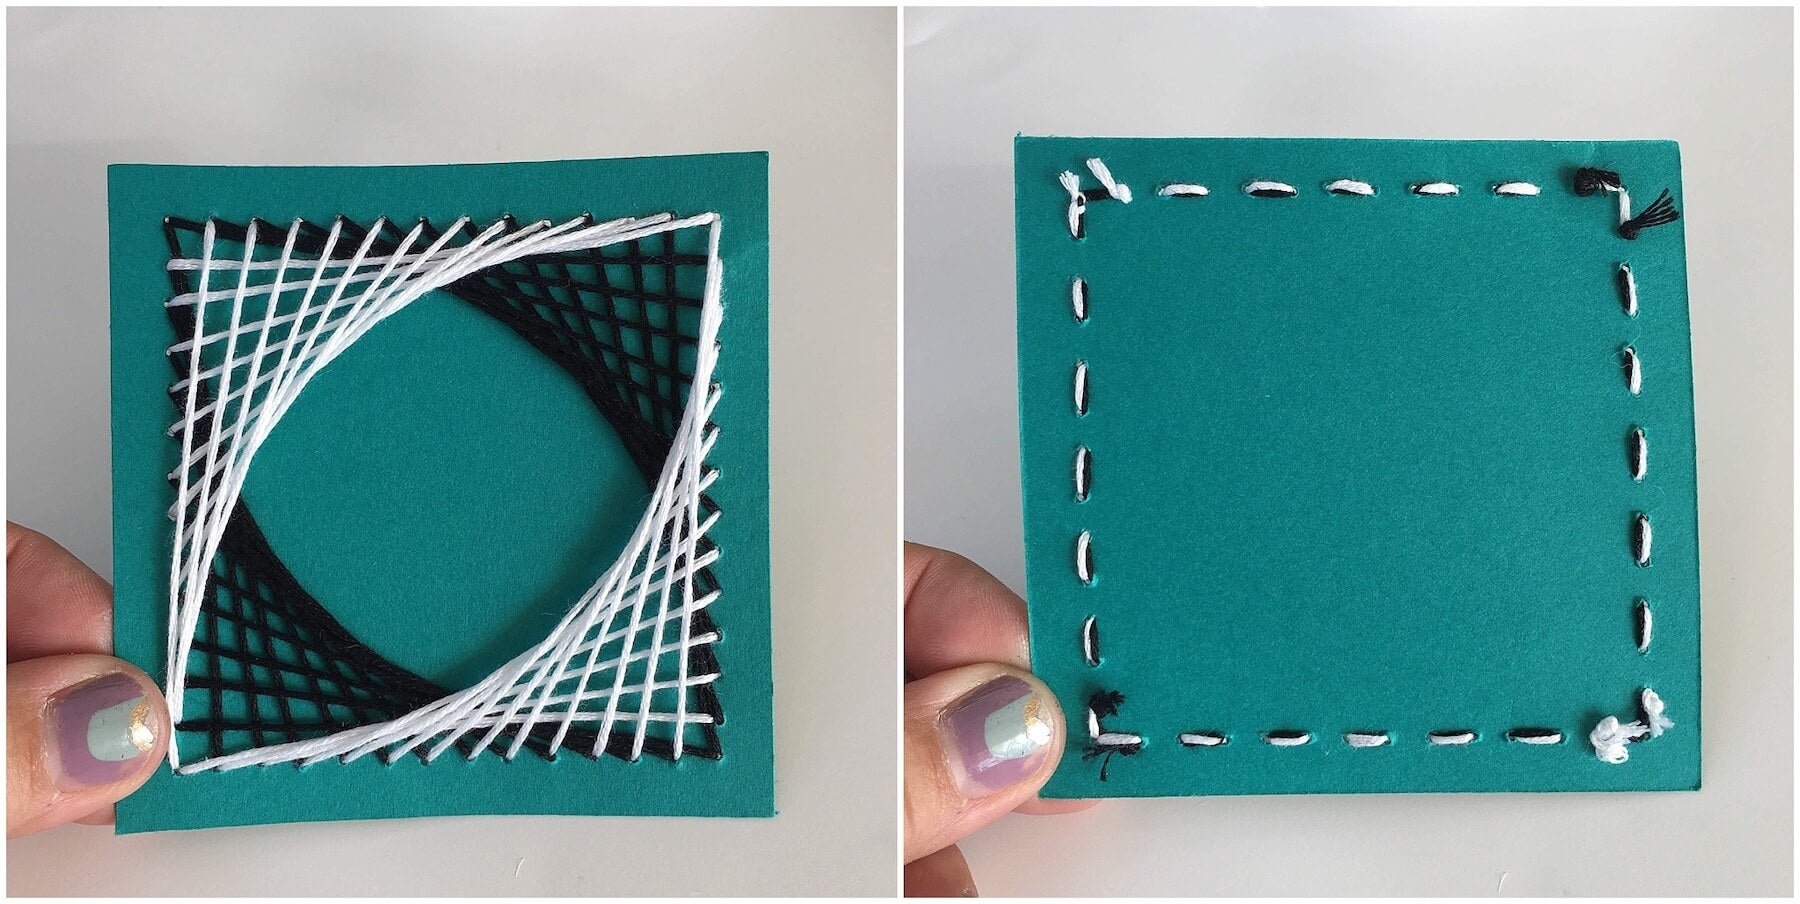
The resulting design will look like this. Make sure your knots are tight.
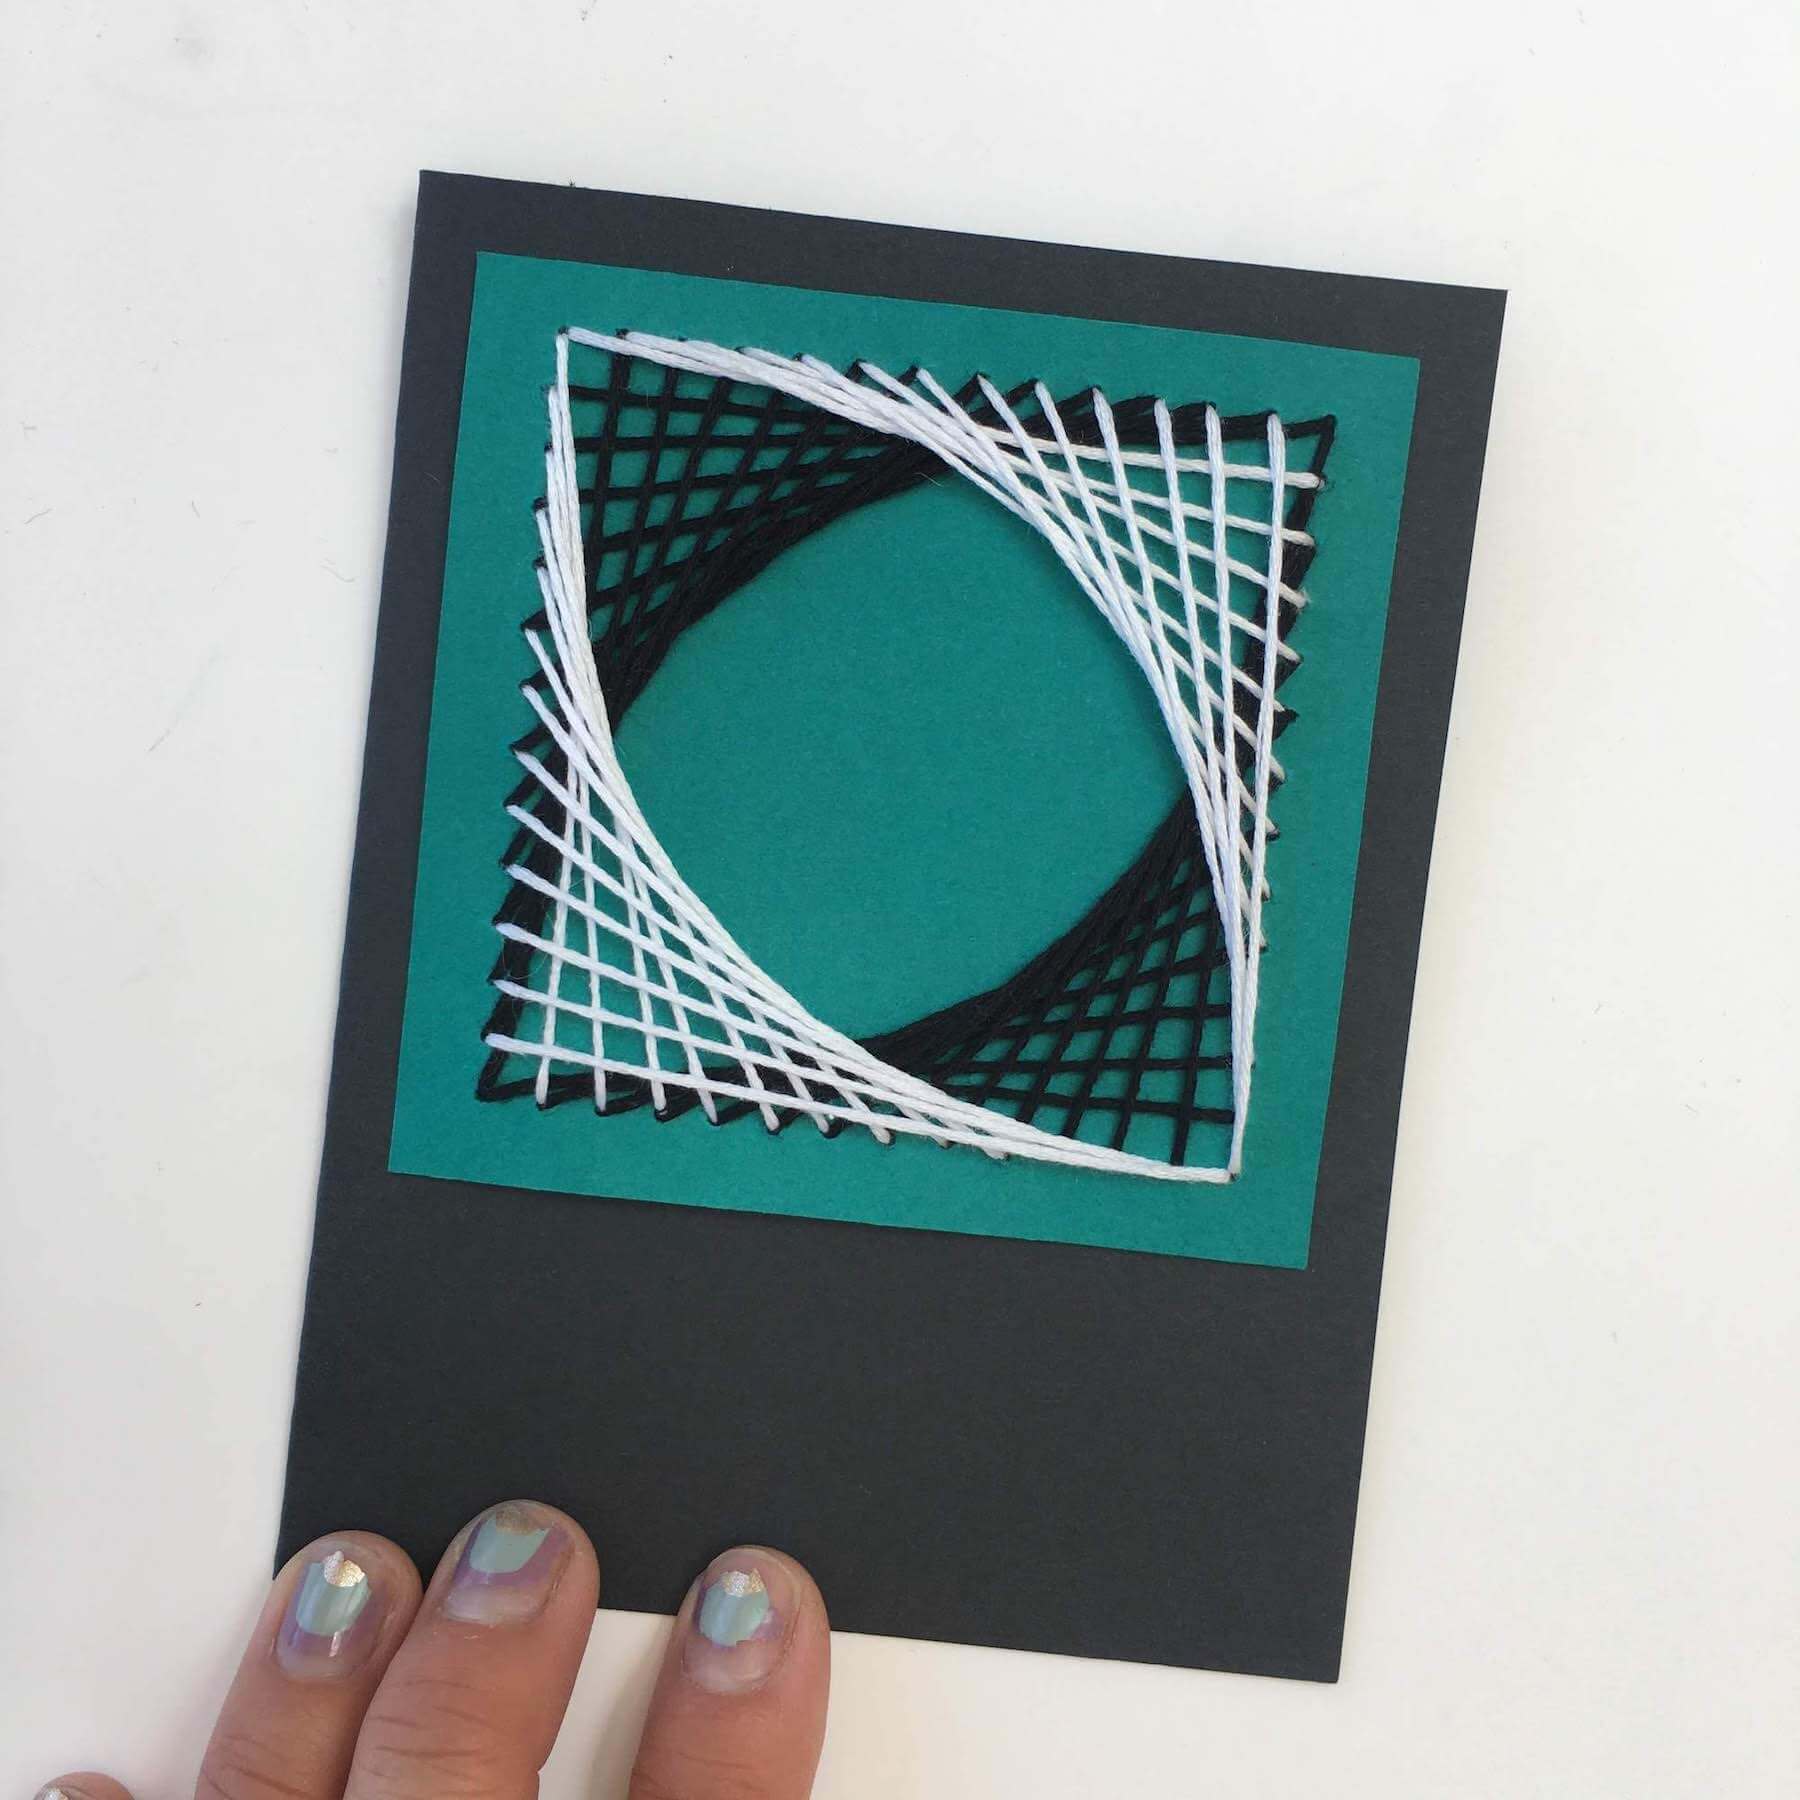
Cut and score the unprinted cardstock sheet into an A2 sized card (folded card dimensions are 5.5” by 4.25”), and use glue dots to adhere stitched cardstock onto folded card.
Sometimes videos are easier than photos. You can view a process video here:
Now that you know the concept of curve stitching, use the remaining square and bookmark to explore the possibilities! Try different colors and various patterns of overlap.
Thank you for joining me on this geometry inspired cardstock project. Tag your string creations with @cardstockwarehouse so we can check them out! Follow me on Instagram at @ginkgomaker for paper and print inspired art.
2 comments
I need eleventy-million patterns for this :D Where did you find it?
I love this!
This is a great project to do with my middle school students.