How to make a birthday card pop up?
Pop up cards are very attractive due to the three dimensional effect which they have when you open them.
You can do the design that you would like We have made this cake which can be used to congratulate the birthday of your friends or family… It is really easy to make.
¡Will surprise you!
Time of the activity: aprox 1,5 hours
Difficulty: Easy
Caution: Pair of scissors
Age: From 6 years
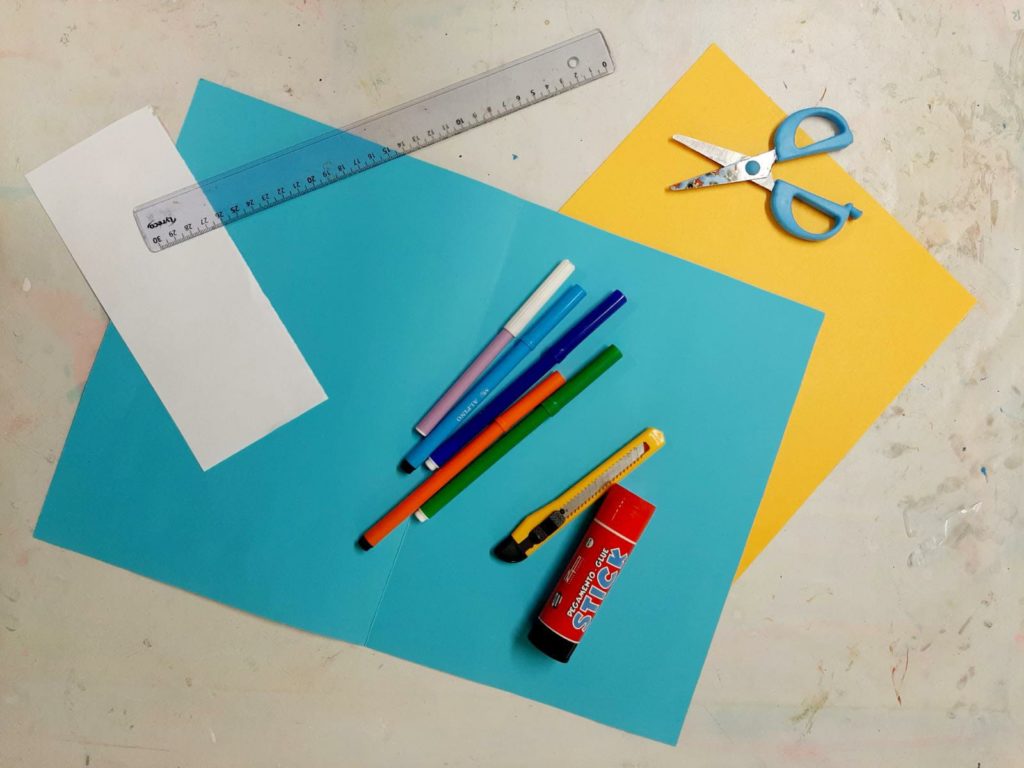
Materials:
- Poster board: 1 A3 (42 x 29,7cm) poster board and another poster board which size should be 40 x 27,7 cm They have to be in different colors One will be used for the outside and the other one will be used for the inside of the card. At the time of buying them, have in mind that you will have to paint on them, so try to choose light colors.
- Pencil
- Ruler
- Pair of scissors
- Rubber
- Glue stick
- A piece of white paper to make the candles
- Markers
- Colored pencil
Making a pop up birthday card step by step:
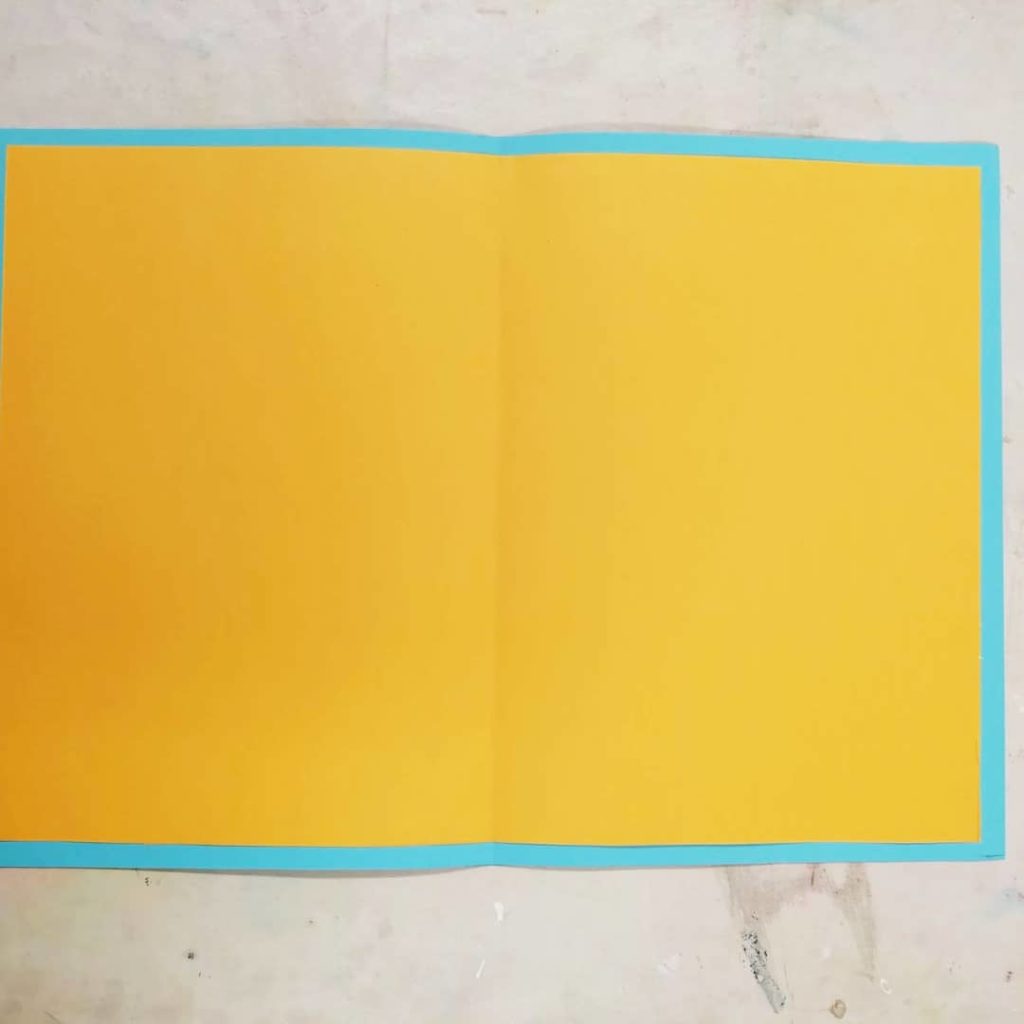
1. Fold both poster board by the middle We have chosen a blue poster board for the outside and a yellow one for the inside
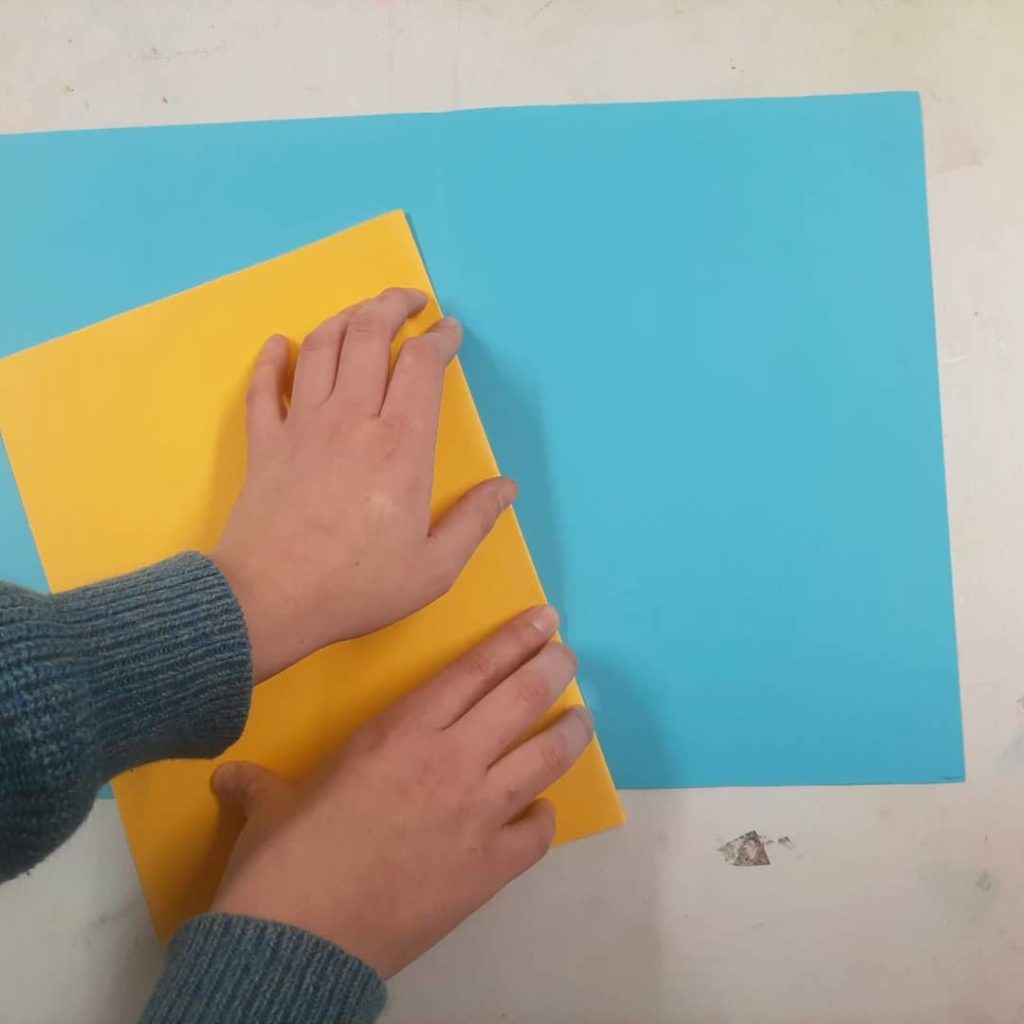
2. Check that one of the posters boards is bigger than the other. In our case the blue is 1 cm larger for each side than the yellow.
If you put the yellow poster board over the blue poster board you will be able to make sure that you have left a margin.
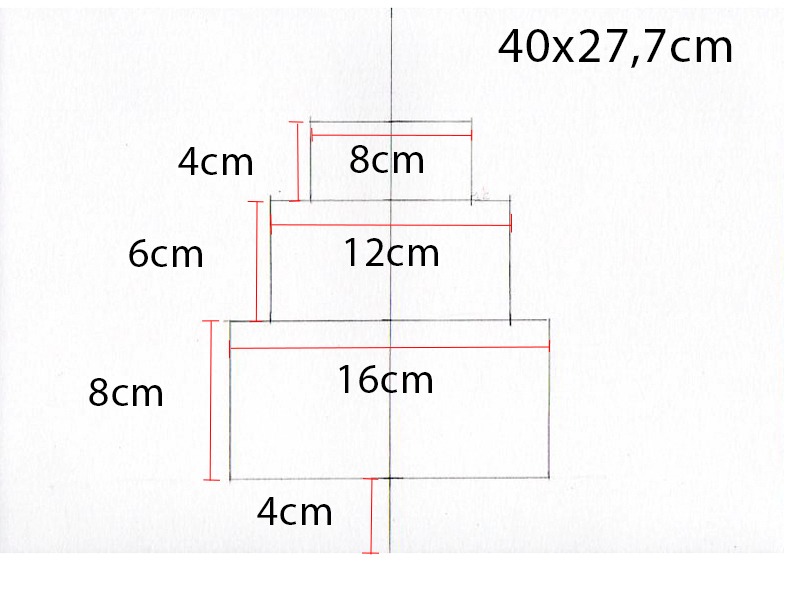
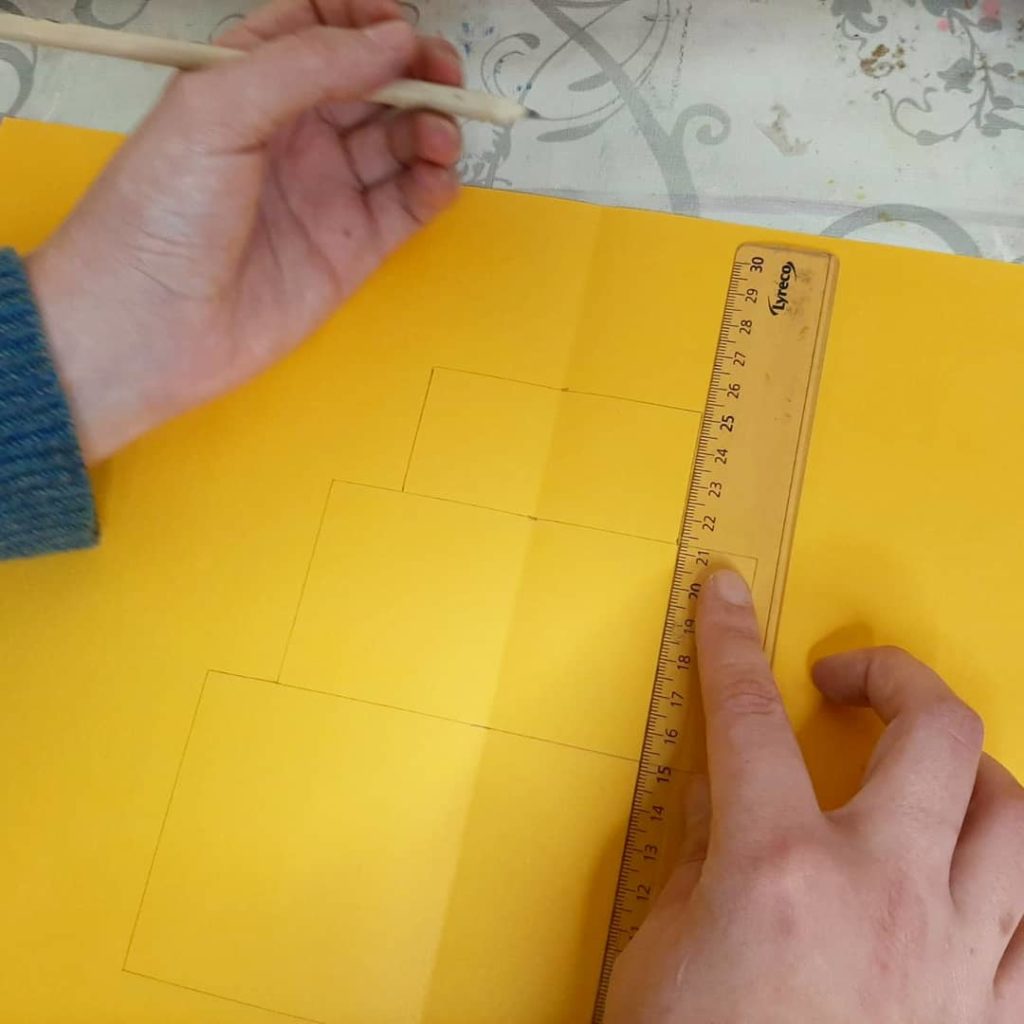
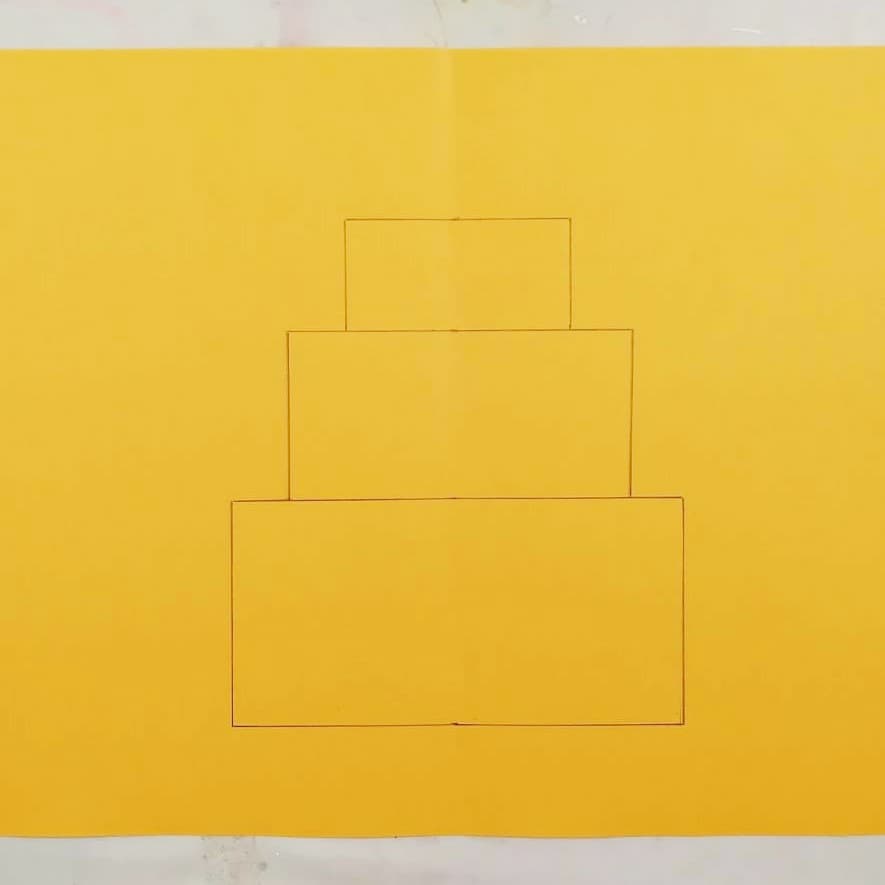
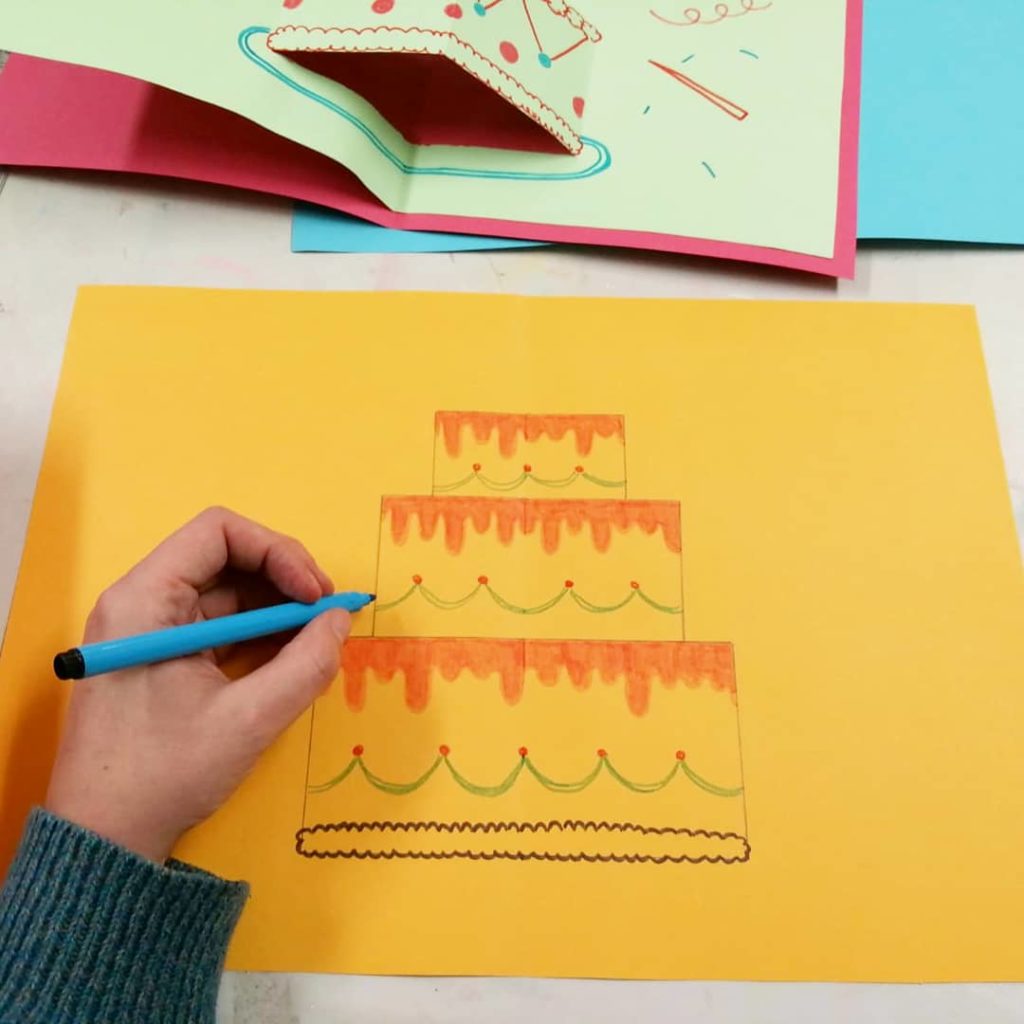
3. On the yellow poster board we will draw a birthday cake.
Following the dimensions that you see on the picture, we will center the cake on the paper.
With the aim of making a symmetric draw we will take as a reference the folding line previously done.
Thus, the lower deck is 16 cm long, it should be 8 cm on each side of the double and 8 cm high.
The middle floor of 12 cm should be 6 cm on each side and 6 cm high. Remove 1 cm from each side to draw it.
The last 8 cm floor will have 4 cm per side and 4 cm high.
4.Now that you have done the structure of the cake you can start to decorate it on your own style. You can make it with markers, pencils, crayons, washi-tape … whatever you want to use.
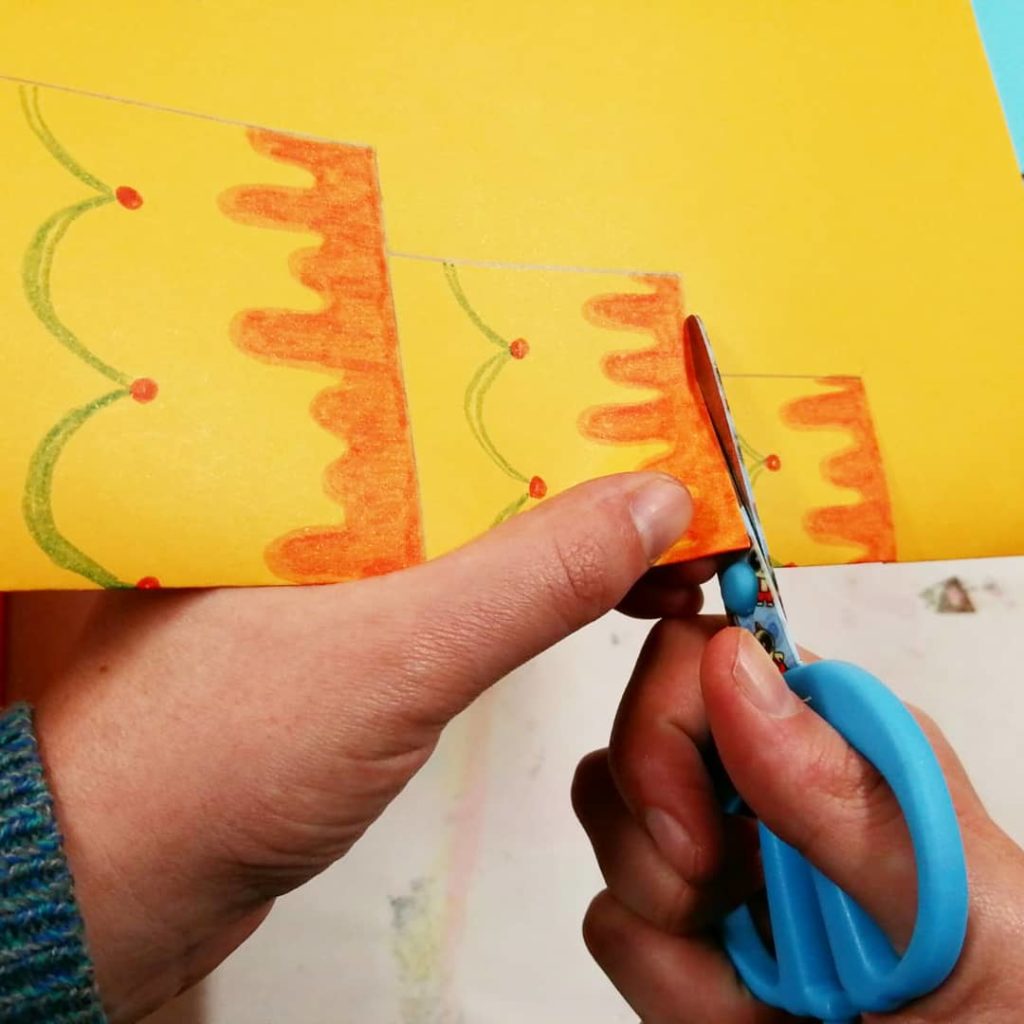
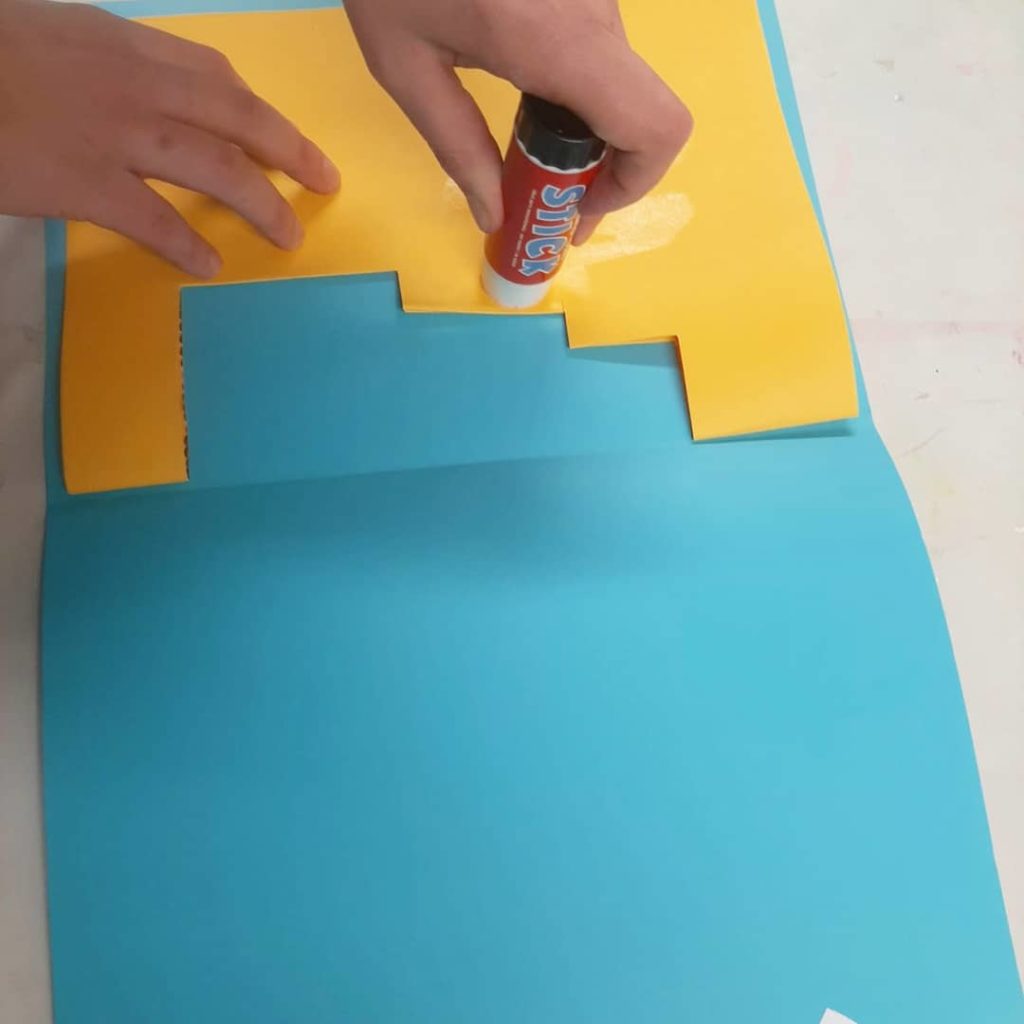
5. Fold the card and cut the differents parts of the cake, ONLY the horizontal ones
Like this:
6. Turn de poster board and open it Now you have to help with your hands to make the parts of the cake pop up. Mark the doubles of the vertical lines with your hands. Look at the image:
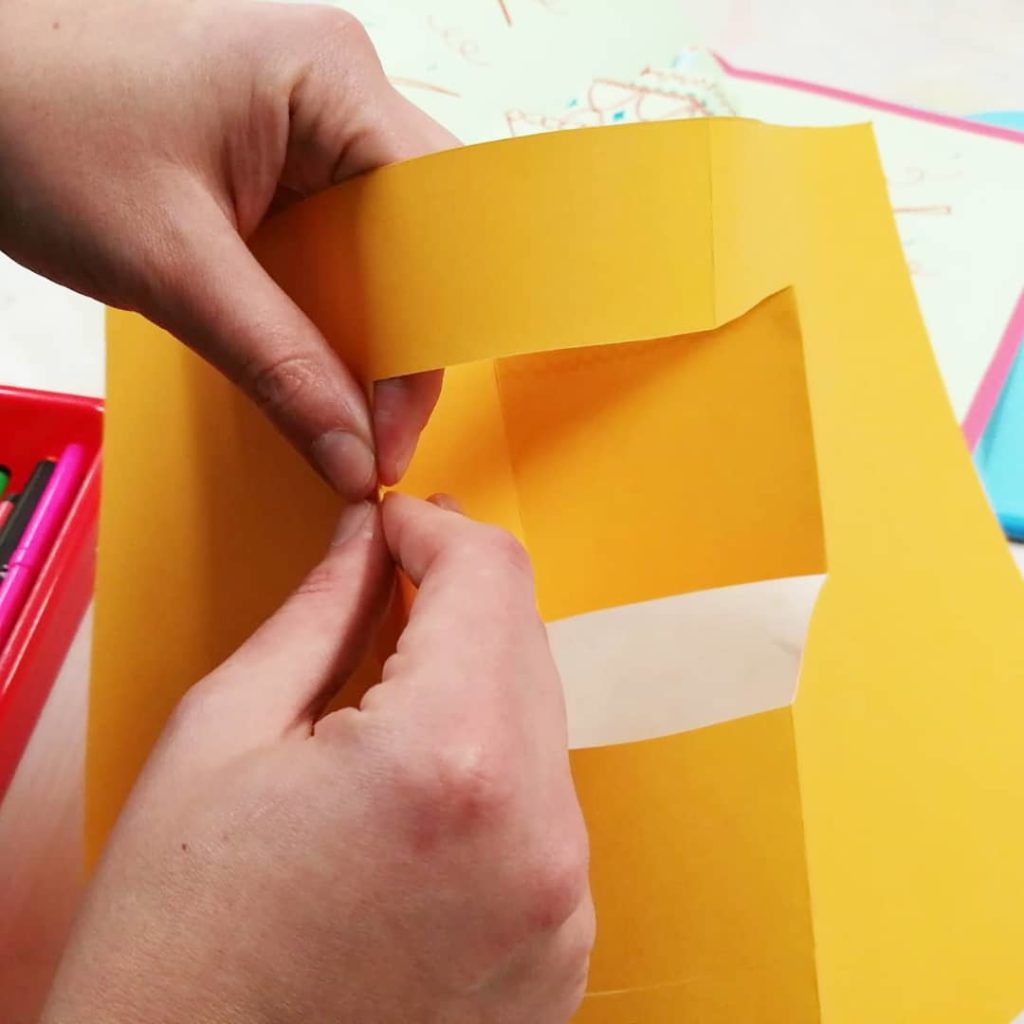
7. It has to be like this behind so that it does the Pop-Up effect:

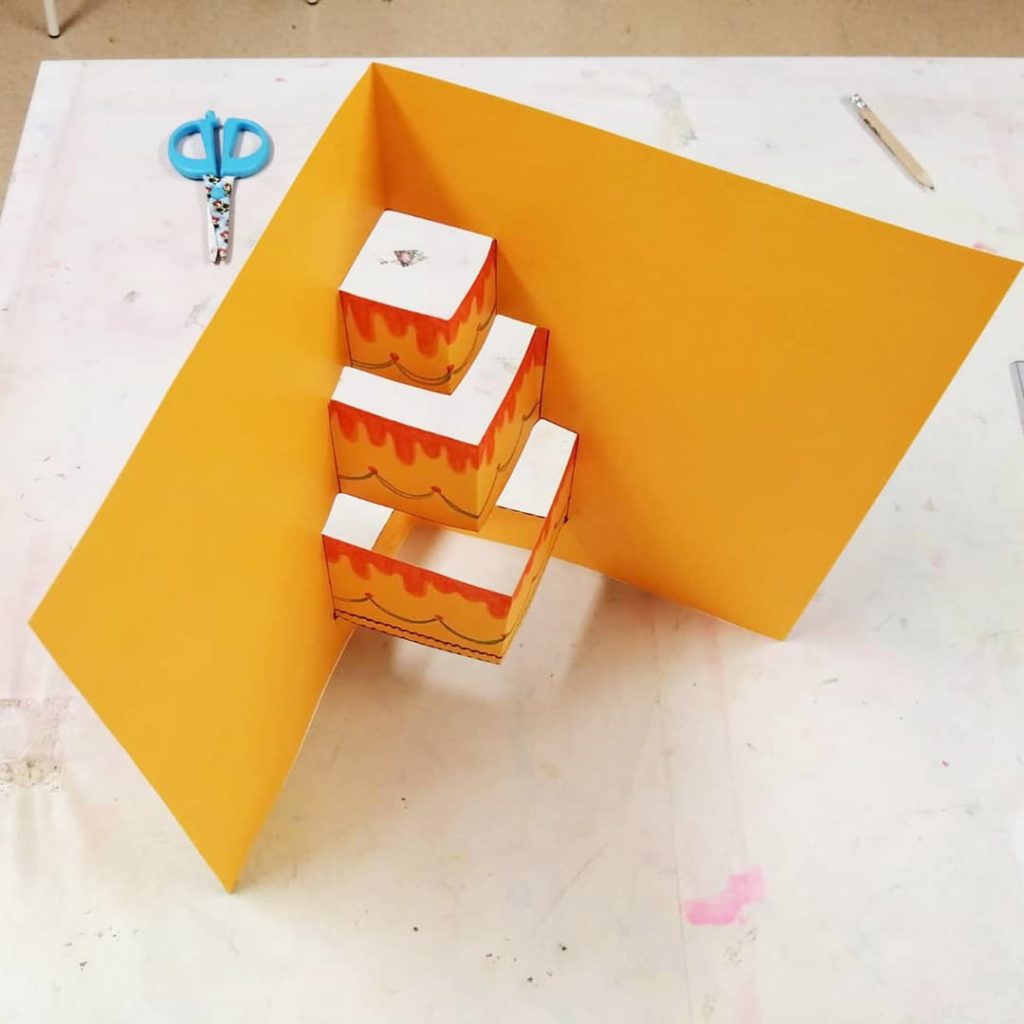
8. On the front, you also can use the three dimensional effect, look at the pictures.

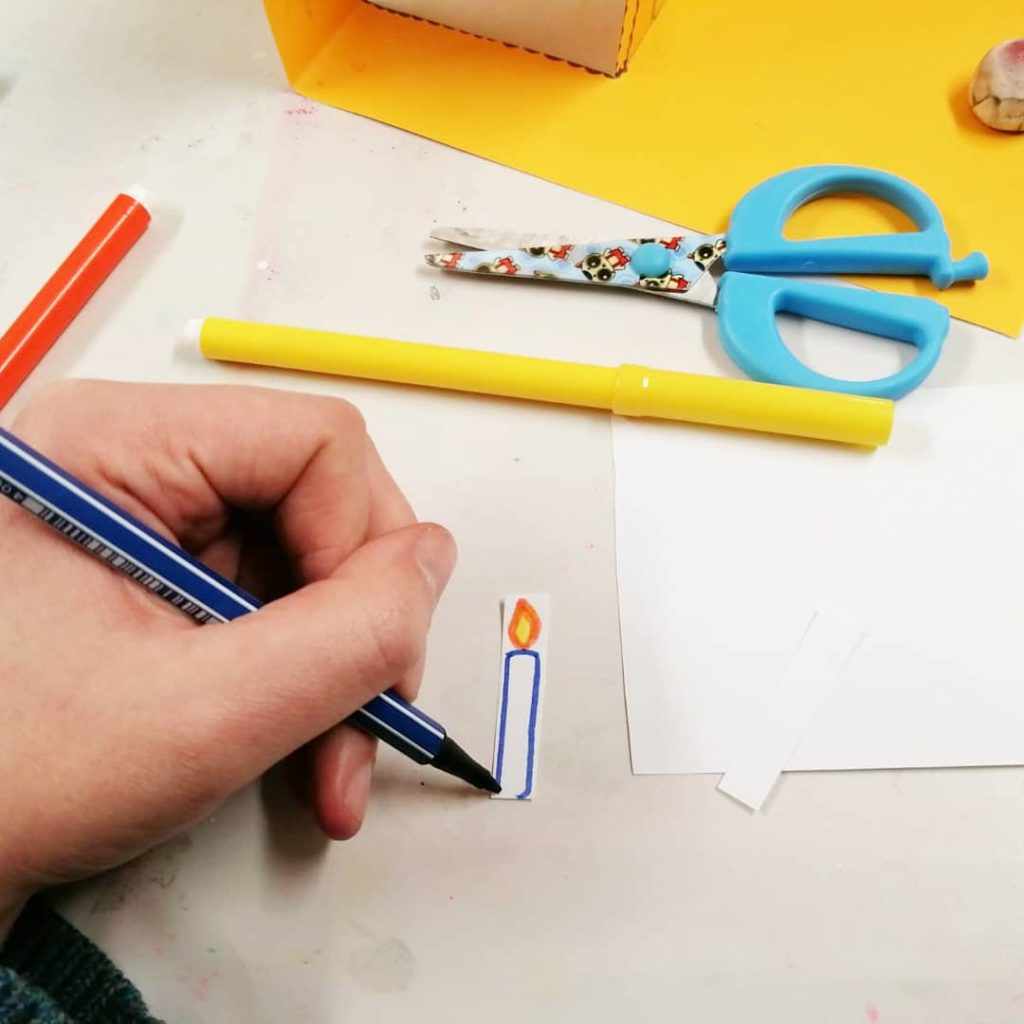
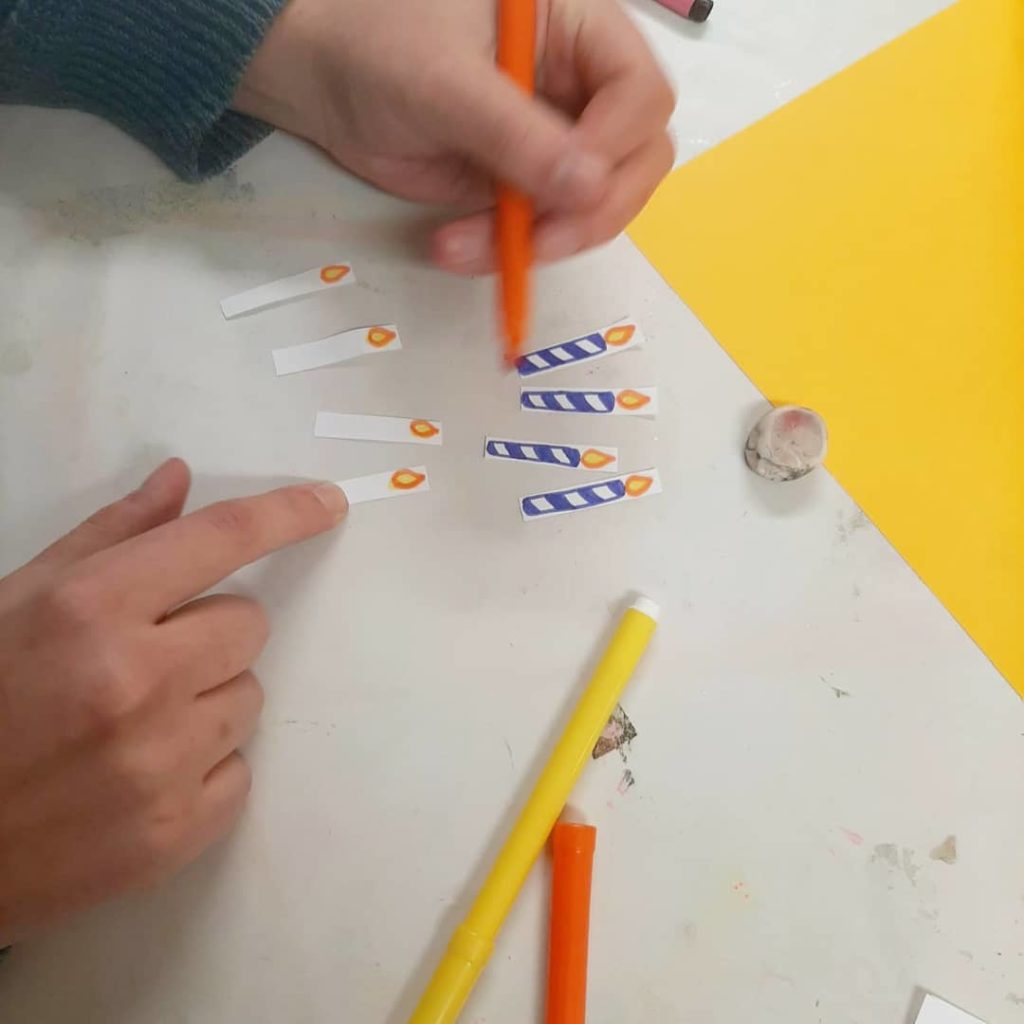
9. Take the white paper and cut it on strips to make the candles of the cake.
You can make them more or less wide or long, and decorate them to your liking.
¡Make as many candles as you want to put on the cake!
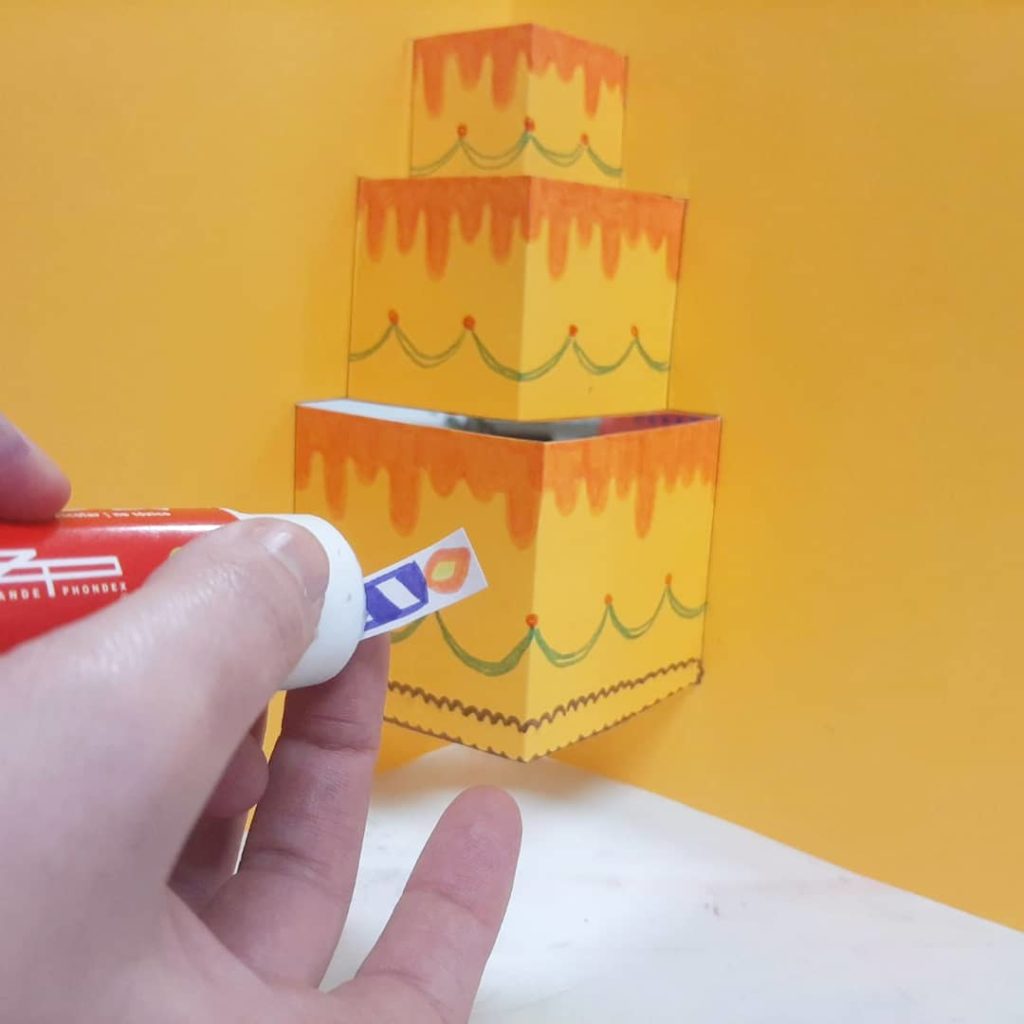
10. We put glue on the front of the candles and stick them from behind.
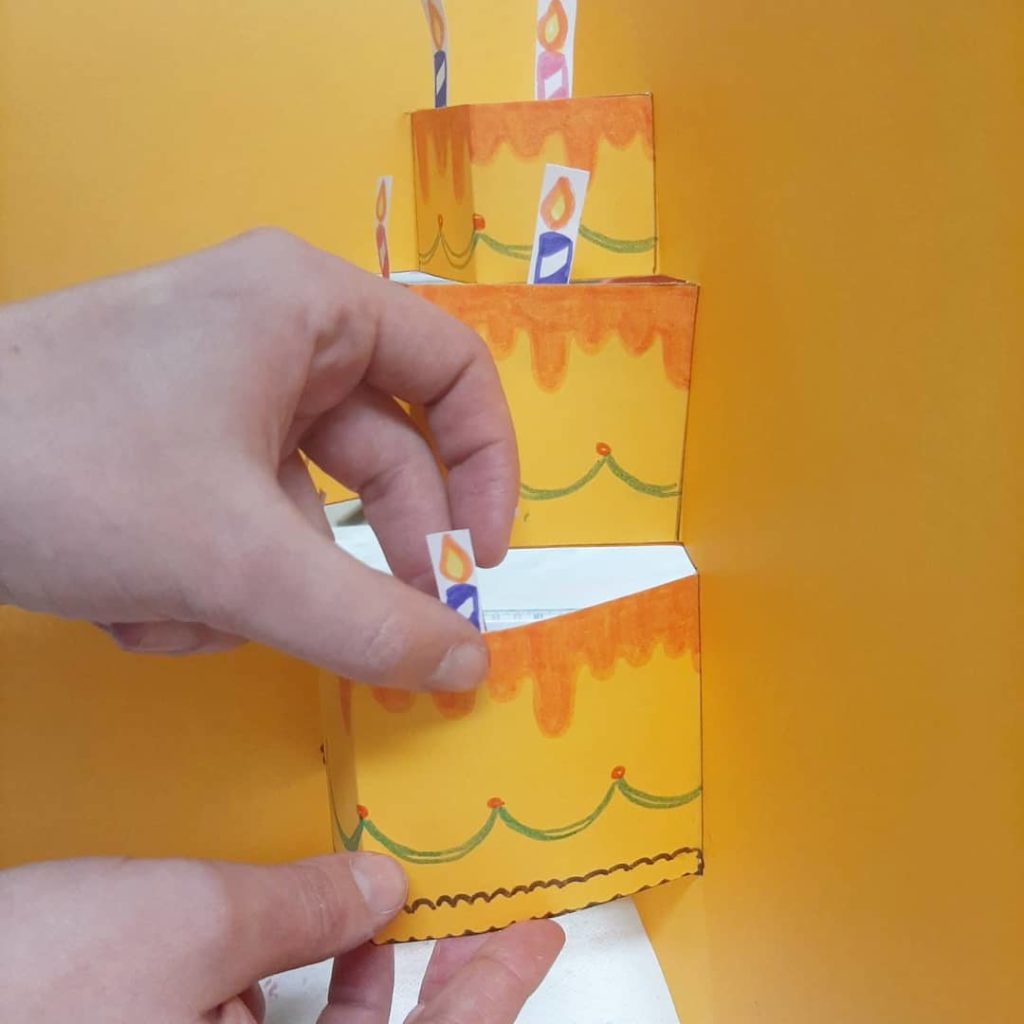
11. Fold the card and glue it onto the blue card. Notice how the part of the cake does not stick, otherwise it would not make the Pop-Up effect. It will look like this:
12. ¡You can open it! ¡¡you will see the Pop-Up effect!! Now you can continue decorating the card and completing it

13. ¡Don’t forget to decorate the cover too!
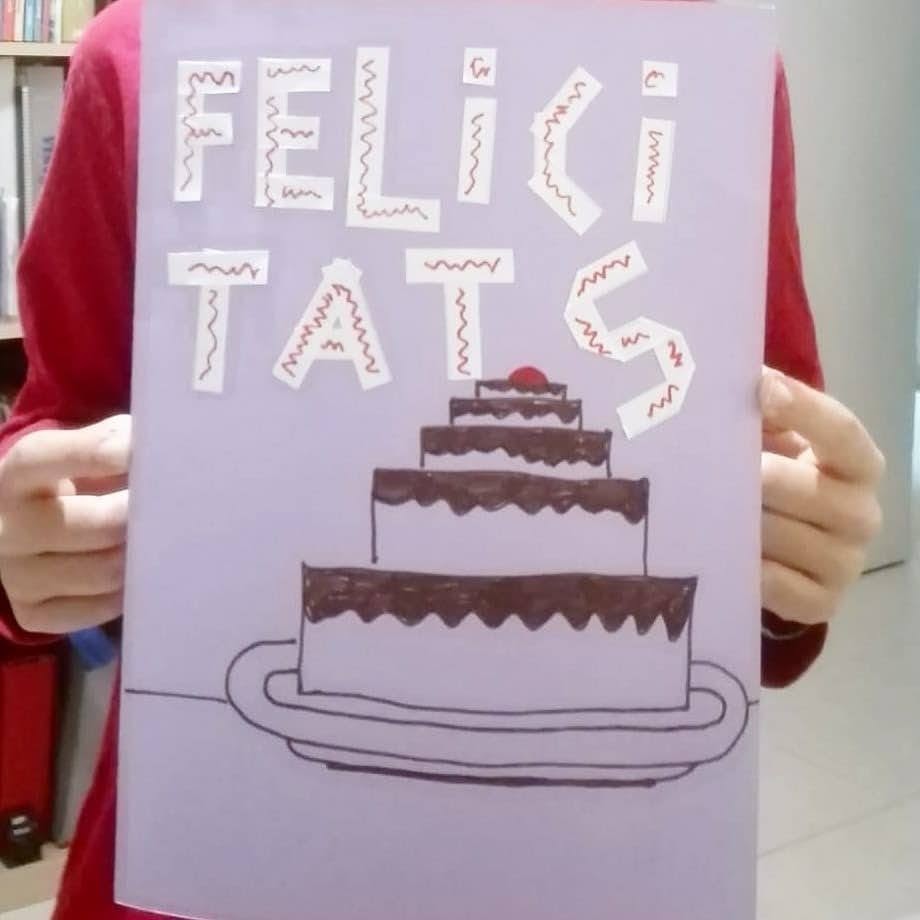
Here you can see David’s decoration on the cover
More about Pop-Up:
Pop up cards are a departure from pop up books.
Have you ever seen a Pop-Up book? There are several artists who only dedicate themselves to this art. Some of them are: Robert Sabuda, Matthew Reinhart or David A. Carter. I highly recommend that you visit their web pages and you will freak out.
But before Pop-up books…. Do you know when the idea of something moving in a book first appeared?
It appeared in religious books, with the Volvelles. ¿What is a Volvelle? It is a paper disk that rotates inside the book. The first Volvelles were used to do calculations or to foresee things.
The first to use the Volvelle was a Benedictine monk in 1250 AD.
Soon after, in 1306, Ramon Llull used this system to illustrate his theories in astrology books.
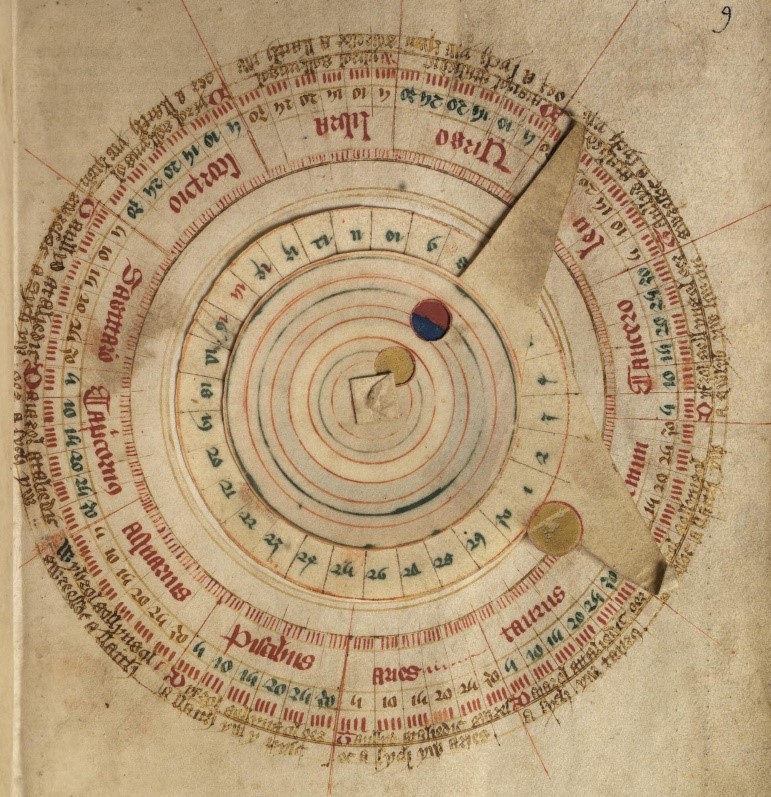
The volvelles continued to be used for centuries. This one that appears in the image is from the s. XV.
In most cases, the illustrations were for academic or scientific purposes. Doctors also used them a lot to illustrate images of the human body and the different layers of it.
From the 17th century, it is when they began to make books to entertain, especially books for children.
Do you dare to make a Volvelle or another Pop-up card? Send us your photos and we will share them.